onlykey-agent
OnlyKey Agent is a hardware-based SSH and GPG agent that allows offline cold storage of your SSH and OpenPGP keys. Instead of keeping keys on a computer, OnlyKey generates and securely stores your keys off of the computer and you can still easily use SSH and GPG.
How to use OnlyKey Agent
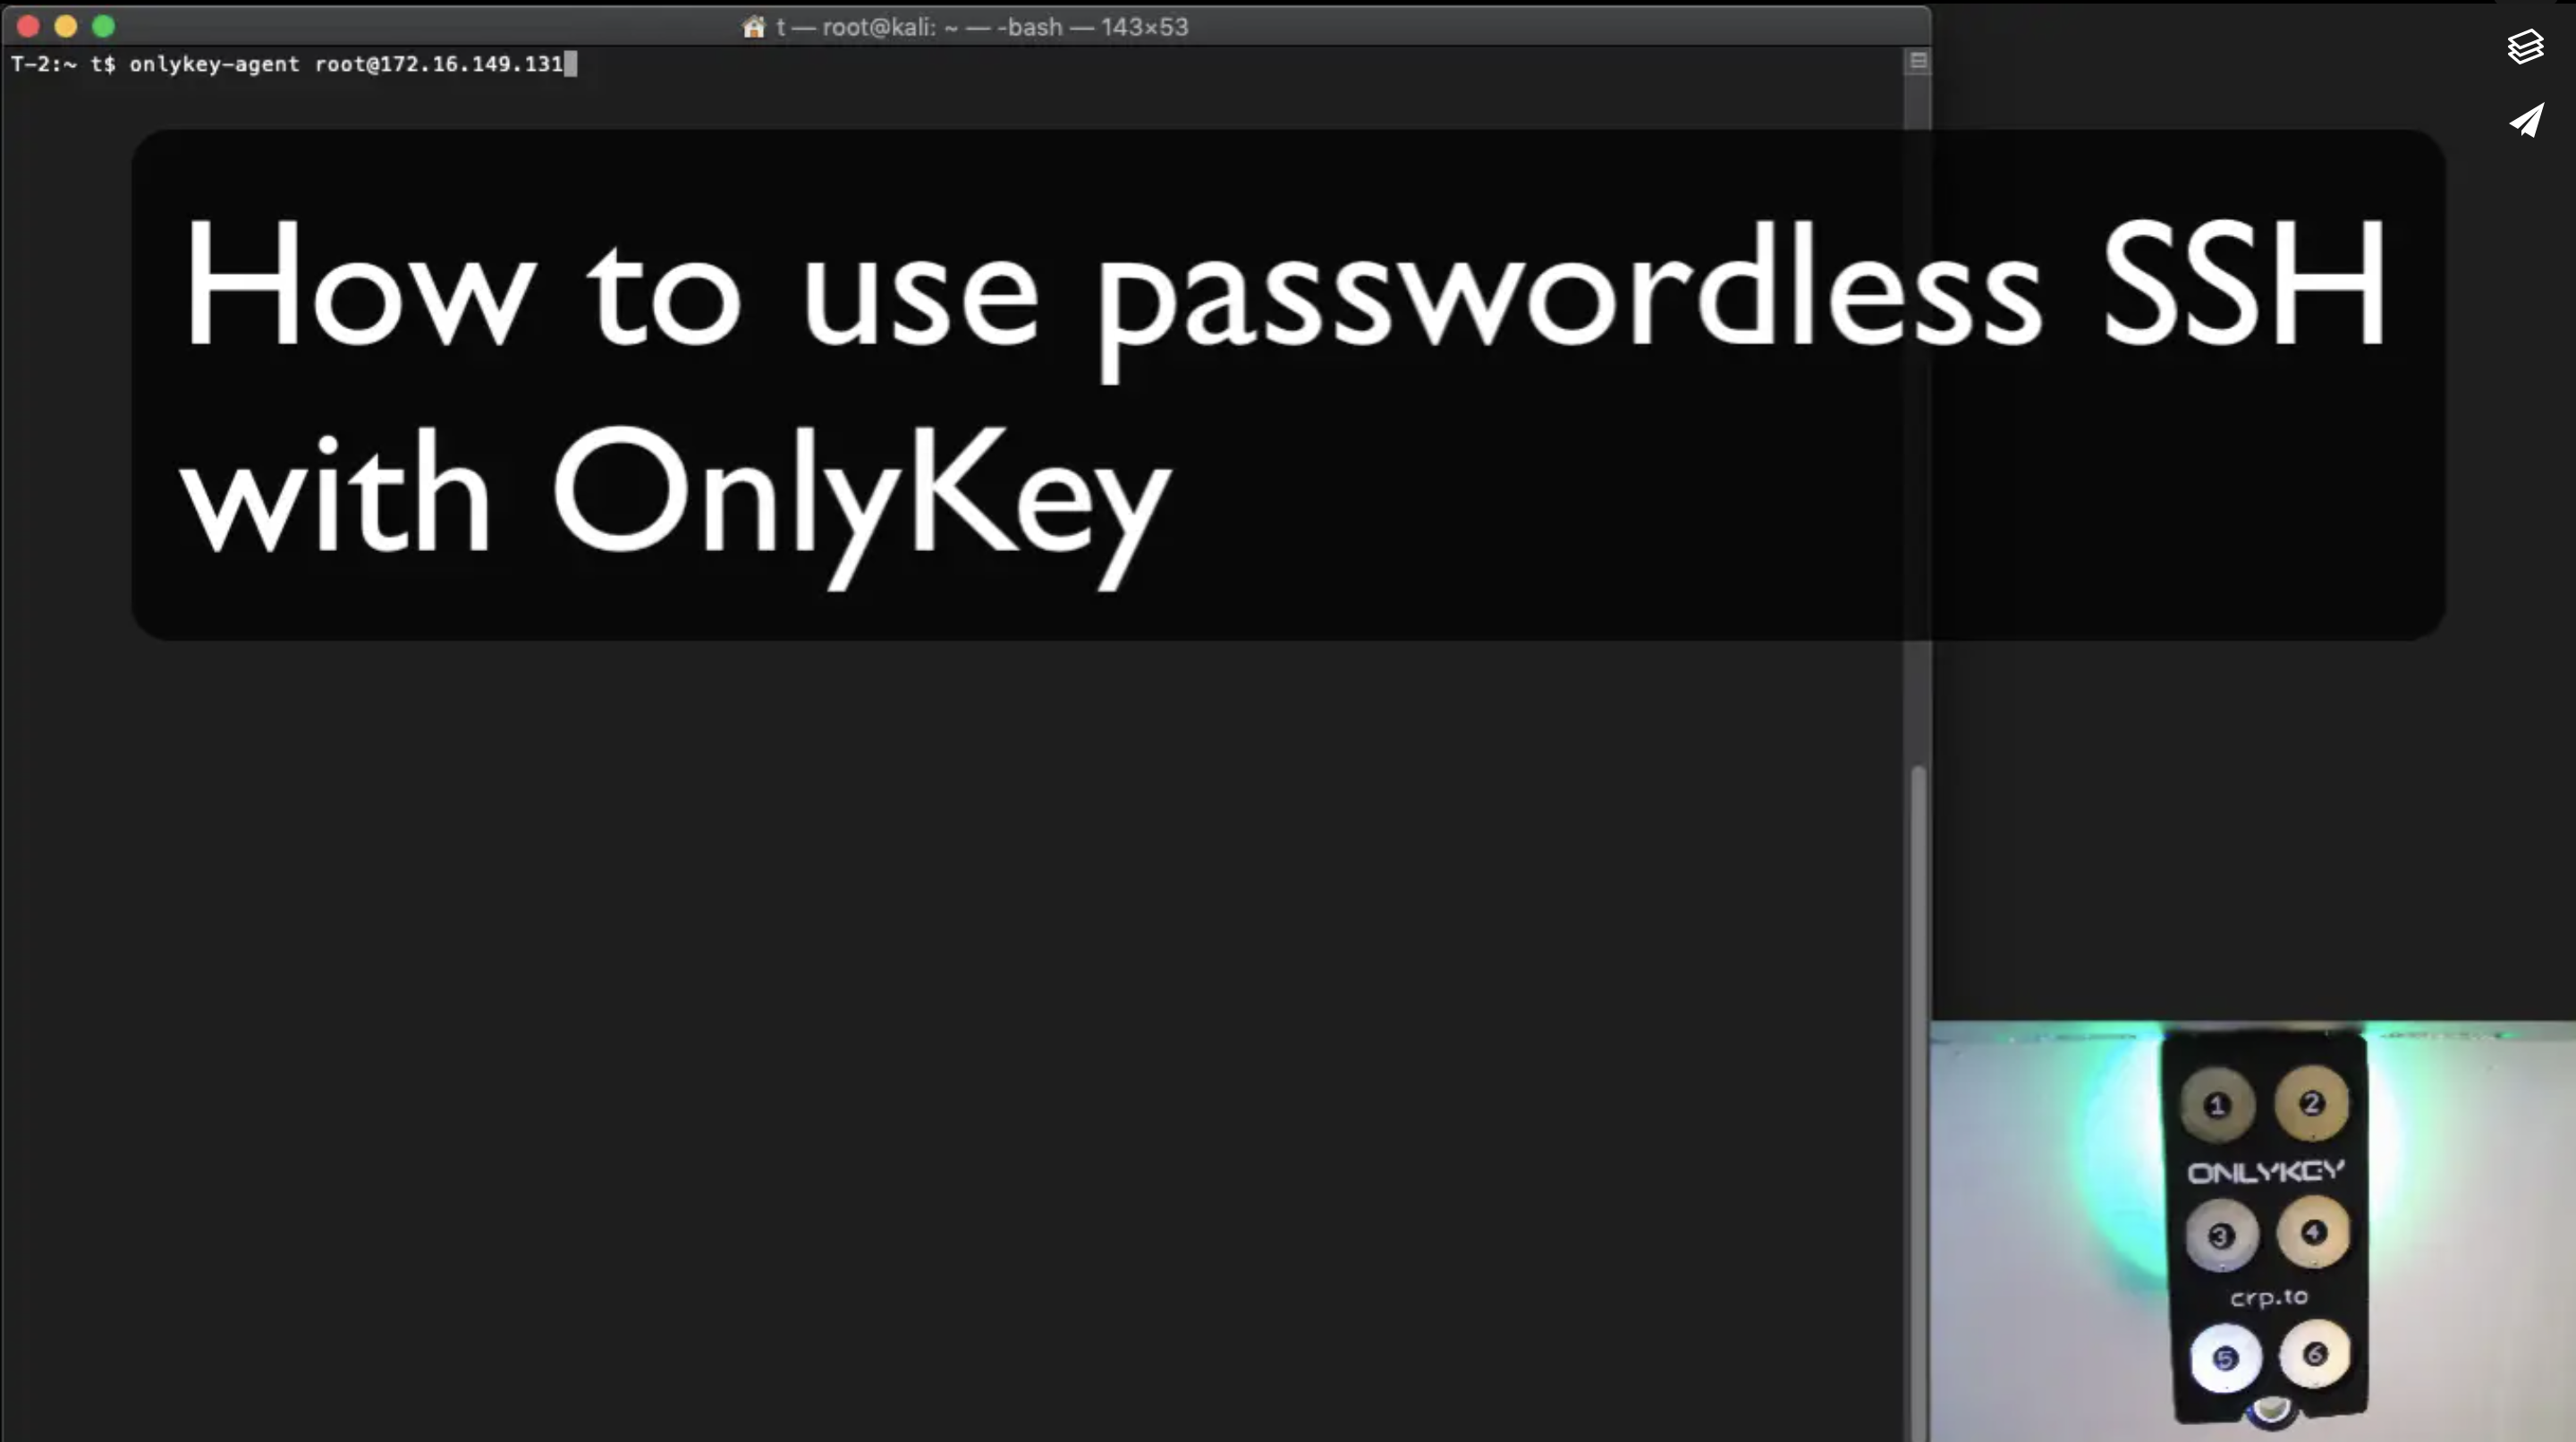
SSH is a popular remote access tool that is often used by administrators and with OnlyKey Agent remote access can be passwordless. GPG (or GnuPG) is a versatile OpenPGP tool that is used for encryption and signing. The way OnlyKey Agent works is that the indicator light on OnlyKey will blink purple for a sign request (such as SSH authentication), and will blink turquoise for a decrypt request. To authorize a user must press button (or challenge code) on OnlyKey.
You can do things like sign your emails, git commits, and software packages, manage your passwords (with pass and gopass, among others), authenticate web tunnels and file transfers, and more. Since many 3rd party applications already integrate with SSH and GPG you can use those as well.
Example shows import (-i) of an existing OpenPGP public key (eccpub.asc) to GnuPG for hardware protected Pass with OnlyKey:

SSH Agent Quickstart Guide
1) After installing prerequisites, install OnlyKey agent on your client machine:
$ pip3 install onlykey-agent
2) Generate your First SSH Key on the OnlyKey
Plug in and unlock your OnlyKey and then run:
$ onlykey-agent identity@myhost
Where identity is your usual SSH user and myhost the host you want to connect to.
3) You now have the SSH public key for the user and the host you previously selected.
i.e.
ssh-ed25519 AAAAC3NzaC1lZDI1NTE5AAAAIJcNZQFm742/hIf6KvbaApQM1VzoW6L2BHANZ4KgiU0o <ssh://identity@myhost|ed25519>
Cut and paste the whole string into your server ~/.ssh/authorized_keys file, you’re now ready to use SSH with your newly generated key.
4) From now on you can log in to your server using OnlyKey using the following command:
$ onlykey-agent identity@myhost -c
You will be prompted for a challenge code, type this on your OnlyKey to complete log in. If you wish to just require any button press to login, in the OnlyKey App -> Preferences choose to disable challenge code (device must be in config mode to change setting).
Common SSH Use Cases
Start a single SSH session
$ onlykey-agent identity@myhost
$ onlykey-agent identity@myhost > ~/.ssh/authorized_keys
$ onlykey-agent identity@myhost -c
Start multiple SSH sessions from a sub-shell
This feature allows using regular SSH-related commands within a subprocess running user’s shell. SSH_AUTH_SOCK environment variable is defined for the subprocess (pointing to the SSH agent, running as a parent process). This way the user can use SSH-related commands (e.g. ssh, ssh-add, sshfs, git, hg), while authenticating via the hardware device.
$ onlykey-agent identity@myhost
$ onlykey-agent identity@myhost -s
$ ssh server@host
$ logout
Run a command with the agent’s environment (subversion, rsync, git)
This method can also be used for git push, scp, or other mechanisms that are using SSH as their communication protocol, the – separator is used to separate onlykey-agent’s arguments from the SSH command arguments.
$ onlykey-agent identity@myhost -- COMMAND --WITH --ARGUMENTS
Use the key for subversion commits
$ onlykey-agent identity@myhost -- svn commit -m "commit message"
Use the key for git clone/pull/fetch/push
$ onlykey-agent identity@myhost -- rsync -a /path someuser@somehost:/remote/path
Use the key for rsyncing
$ onlykey-agent identity@myhost -- rsync -a /path someuser@somehost:/remote/path
Copy a file to an SSH server running in Termux running on an android device
$ onlykey-agent identity@myhost -- scp -P 8022 /path/somefile.txt 192.168.56.195:/sdcard/
Access remote Git/Mercurial repositories
Export your public key and register it in your repository web interface (e.g. GitHub):
$ onlykey-agent [email protected] > ~/.ssh/github.pub
Add the following configuration to your ~/.ssh/config file:
Host github.com
	IdentityFile ~/.ssh/github.pub
Use the following Bash alias for convenient Git operations:
$ alias ssh-shell='onlykey-agent ~/.ssh/github.pub -v --shell'
Now, you can use regular Git commands under the “SSH-enabled” sub-shell:
$ ssh-shell
$ git push origin master
The same works for Mercurial (e.g. on BitBucket):
$ ssh-shell
$ hg push
GPG Agent Quickstart Guide
1) After installing prerequisites and setting Derived Key User Input Mode install OnlyKey agent on your client machine:
$ pip3 install onlykey-agent
2) Plug in and unlock your OnlyKey and then run:
$ onlykey-gpg init "Bob Smith <[email protected]>"
Where “Bob Smith [email protected]” is your email address that you want to use with your GPG identity.
3) Add export GNUPGHOME=~/.gnupg/onlykey to your .bashrc or other environment file.
This GNUPGHOME contains your hardware keyring and agent settings. This agent software assumes all keys are backed by hardware devices so you can’t use standard GPG keys in GNUPGHOME (if you do mix keys you’ll receive an error when you attempt to use them).
If you wish to switch back to your software keys unset GNUPGHOME.
4) Log out and back into your session to ensure your environment is updated everywhere.
Inspect GPG keys
You can use GNU Privacy Assistant (GPA) in order to inspect the created keys and perform signature and decryption operations as usual:
$ sudo apt install gpa
$ gpa
Sign Git commits and tags
Git can use GPG to sign and verify commits and tags (see here):
$ git config --local commit.gpgsign 1
$ git config --local gpg.program $(which gpg2)
$ git commit --gpg-sign                      # create GPG-signed commit
$ git log --show-signature -1                # verify commit signature
$ git tag v1.2.3 --sign                      # create GPG-signed tag
$ git tag v1.2.3 --verify                    # verify tag signature
Tips
Note that your git email has to correlate to your gpg key email. If you use a different email for git, you’ll need to either generate a new gpg key for that email or set your git email using the command:
$ git config user.email [email protected]
If your git email is configured incorrectly, you will receive the error:
error: gpg failed to sign the data
fatal: failed to write commit object
when committing to git.
Also you might need to specify the KeyId used for signature:
- First retrieve the keyID with
gpg --list-keys "Bob Smith <[email protected]>" - Then configure git
$ git config user.signingkey <KeyID>
Finally when creating the commit, don’t forget to touch the key to complete challenge/response.
Manage passwords
Password managers such as pass and gopass rely on GPG for encryption so you can use your device with them too.
With pass:
First install pass from [passwordstore.org] and initialize it to use your OnlyKey-based GPG identity:
$ pass init "Bob Smith <[email protected]>"
Password store initialized for Bob Smith <[email protected]>
Then, you can generate truly random passwords and save them encrypted using your public key (as separate .gpg files under ~/.password-store/):
$ pass generate Dev/github 32
$ pass generate Social/hackernews 32
$ pass generate Social/twitter 32
$ pass generate VPS/linode 32
$ pass
Password Store
├── Dev
│   └── github
├── Social
│   ├── hackernews
│   └── twitter
└── VPS
    └── linode
In order to paste them into the browser, you’d need to decrypt the password using your hardware device:
$ pass --clip VPS/linode
Copied VPS/linode to clipboard. Will clear in 45 seconds.
You can also use the following Qt-based UI for pass:
$ sudo apt install qtpass
Re-generate a GPG identity
You can re-run the init command to regenerate your GPG key.
$ rm -rf ~/.gnupg/onlykey
$ onlykey-gpg init "Bob Smith <[email protected]>"
Add OnlyKey-based subkey to an existing GnuPG Identity (not created with onlykey-gpg)
Rather than using onlykey-gpg init to create a new GPG key, a subkey may be added to an existing GPG key (not created with onlykey-gpg).
$ gpg2 -k foobar
pub   rsa2048/90C4064B 2017-10-10 [SC]
uid         [ultimate] foobar
sub   rsa2048/4DD05FF0 2017-10-10 [E]

$ onlykey-gpg init "foobar" --subkey
Add new user IDs (UIDs) to your OnlyKey GnuPG Identity
After your main identity is created, you can add new user IDs using the regular GnuPG commands:
$ onlykey-gpg init "Foobar" -vv
$ export GNUPGHOME=${HOME}/.gnupg/onlykey
$ gpg2 -K
------------------------------------------
sec   nistp256/6275E7DA 2017-12-05 [SC]
uid         [ultimate] Foobar
ssb   nistp256/35F58F26 2017-12-05 [E]

$ gpg2 --edit Foobar
gpg> adduid
Real name: Xyzzy
Email address:
Comment:
You selected this USER-ID:
    "Xyzzy"

Change (N)ame, (C)omment, (E)mail or (O)kay/(Q)uit? o

gpg> save

$ gpg2 -K
------------------------------------------
sec   nistp256/6275E7DA 2017-12-05 [SC]
uid         [ultimate] Xyzzy
uid         [ultimate] Foobar
ssb   nistp256/35F58F26 2017-12-05 [E]
Stored Keys
By default OnlyKey will generate a random key that is used to derive an unlimited number of keys for SSH and GPG use. Since each derived key is different based on the identity@myhost provided, it is required to copy the unique public key for each host.
i.e.
ssh-ed25519 AAAAC3NzaC1lZDI1NTE5AAAAIJcNZQFm742/hIf6KvbaApQM1VzoW6L2BHANZ4KgiU0o <ssh://identity@myhost|ed25519>
ssh-ed25519 AAAAC3NzaC1lZDI1NTE5AAAAIIXzPsm6lkM6xSADnwh/S1IGLlU+dHE8M/xEp2qeol2w <ssh://identity@myhost2|ed25519>
ssh-ed25519 AAAAC3NzaC1lZDI1NTE5AAAAILb27+QTNo+9+xm1AzvlQHmjWt1XMwokM00xfZPJiUHP <ssh://identity@myhost3|ed25519>
OnlyKey also stores up to 16 elliptic curve private keys (ECC1 - ECC16) and 4 RSA private keys (RSA1 - RSA4) that may be used instead of the default derived keys. To use stored keys, first a key must be loaded onto OnlyKey. The easiest way to load a key is to use an existing OpenPGP key such as an X25519 Protonmail key, or an OpenSSH key.
Follow the guide here to load an existing OpenPGP key or the guide here to load an existing OpenSSH key.
By default, when set to “Slot: Auto Load” in the OnlyKey app, OpenPGP or OpenSSH keys are stored as follows:
- RSA Decryption key (GPG) in slot RSA1
- RSA Signing key (SSH/GPG) in slot RSA2
- ECC (NIST256P1 and X25519) Decryption key (GPG) in slot ECC1
- ECC (NIST256P1 and X25519) Signing key (SSH/GPG) slot ECC2
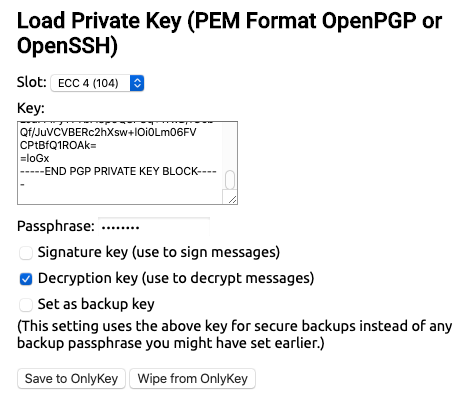
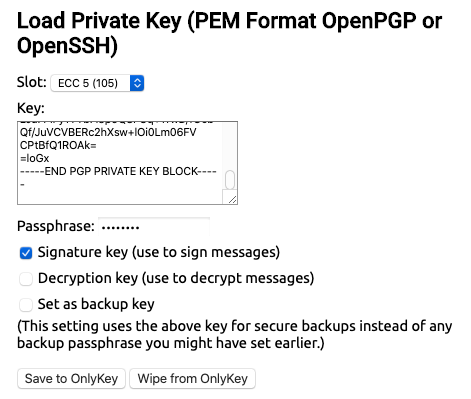
Advanced users may load and use keys in any of the 4 RSA slots, and 16 ECC slots. For example, to set an ECC key in ECC4 and ECC5 :


Then to use the stored keys the -sk (signing key) and -dk (decryption key) flags are used like this:
$ onlykey-gpg init "Bob Smith <[email protected]>" -sk ECC5 -dk ECC4 -i [email protected]
SSH Agent Quickstart Guide (Stored Keys)
1) After installing prerequisites and loading key install OnlyKey agent on your client machine:
$ pip3 install onlykey-agent
2) Generate your First SSH Key on the OnlyKey
Plug in and unlock your OnlyKey and then run:
$ onlykey-agent identity@myhost -sk ECC2
Where identity is your usual SSH user, myhost is the host you want to connect to, and -sk ECC2 is the signing key to use.
3) You now have the SSH public key for the user and the host you previously selected.
i.e.
ssh-ed25519 AAAAC3NzaC1lZDI1NTE5AAAAIJcNZQFm742/hIf6KvbaApQM1VzoW6L2BHANZ4KgiU0o <ssh://identity@myhost|ed25519>
Cut and paste the whole string into your server ~/.ssh/authorized_keys file, you’re now ready to use SSH with your newly generated key.
4) From now on you can log in to your server using OnlyKey using the following command:
$ onlykey-agent identity@myhost -c -sk ECC2
GPG Agent Quickstart Guide (Stored Keys)
1) After installing prerequisites, loading OpenPGP key, and setting Stored Key User Input Mode, install OnlyKey agent on your client machine:
$ pip3 install onlykey-agent
2) Plug in and unlock your OnlyKey and then run:
$ onlykey-gpg init "Bob Smith <[email protected]>" -sk ECC2 -dk ECC1 -i [email protected]
Where “Bob Smith [email protected]” is your email address from your OpenPGP key, “[email protected]” is your OpenPGP public key, -sk ECC2 is the signing key to use, and -dk ECC1 is the decryption key to use.
3) Add export GNUPGHOME=~/.gnupg/onlykey to your .bashrc or other environment file. i.e.
$ export GNUPGHOME=${HOME}/.gnupg/onlykey
This GNUPGHOME contains your hardware keyring and agent settings. This agent software assumes all keys are backed by hardware devices so you can’t use standard GPG keys in GNUPGHOME (if you do mix keys you’ll receive an error when you attempt to use them).
If you wish to switch back to your software keys unset GNUPGHOME.
4) Log out and back into your session to ensure your environment is updated everywhere.
Installation
Windows Install with dependencies
Currently Windows is not supported directly but may be used with a Linux virtual machine in Windows Subsystem for Linux (WSL 2) by following instructions here Another alternative is to use OpenSSH v8.2 which supports OnlyKey as a FIDO security key.
MacOS Install with dependencies
We recommend installing with Homebrew.
$ brew install onlykey-agent
Alternatively, you can install using PIP
$ pip3 install onlykey-agent
Ubuntu Install with dependencies
$ sudo apt update && sudo apt upgrade
$ sudo apt install python3-pip python3-tk libusb-1.0-0-dev libudev-dev
$ pip3 install onlykey-agent
$ wget https://raw.githubusercontent.com/trustcrypto/trustcrypto.github.io/pages/49-onlykey.rules
$ sudo cp 49-onlykey.rules /etc/udev/rules.d/
$ sudo udevadm control --reload-rules && udevadm trigger
Debian Install with dependencies
$ sudo apt update && sudo apt upgrade
$ sudo apt install python3-pip python3-tk libusb-1.0-0-dev libudev-dev
$ pip3 install onlykey-agent
$ wget https://raw.githubusercontent.com/trustcrypto/trustcrypto.github.io/pages/49-onlykey.rules
$ sudo cp 49-onlykey.rules /etc/udev/rules.d/
$ sudo udevadm control --reload-rules && udevadm trigger
RedHat Install with dependencies
$ yum update
$ yum install python3-pip python3-devel python3-tk libusb-devel libudev-devel \
              gcc redhat-rpm-config
$ pip3 install onlykey-agent
$ wget https://raw.githubusercontent.com/trustcrypto/trustcrypto.github.io/pages/49-onlykey.rules
$ sudo cp 49-onlykey.rules /etc/udev/rules.d/
$ sudo udevadm control --reload-rules && udevadm trigger
Fedora Install with dependencies
$ dnf install python3-pip python3-devel python3-tkinter libusb-devel libudev-devel \
              gcc redhat-rpm-config
$ pip3 install onlykey-agent
$ wget https://raw.githubusercontent.com/trustcrypto/trustcrypto.github.io/pages/49-onlykey.rules
$ sudo cp 49-onlykey.rules /etc/udev/rules.d/
$ sudo udevadm control --reload-rules && udevadm trigger
OpenSUSE Install with dependencies
$ zypper install python3-pip python3-devel python3-tk libusb-1_0-devel libudev-devel
$ pip3 install onlykey-agent
$ wget https://raw.githubusercontent.com/trustcrypto/trustcrypto.github.io/pages/49-onlykey.rules
$ sudo cp 49-onlykey.rules /etc/udev/rules.d/
$ sudo udevadm control --reload-rules && udevadm trigger
Linux UDEV Rule
In order for non-root users in Linux to be able to communicate with OnlyKey a udev rule must be created as described here.
Roadmap
In a future release we will be implementing the following features:
- GPG challenge code add on to pass the challenge code to GPG for displaying to the user.
- Windows support and stand-alone EXE for easy deployment. This feature is not yet implemented, it is possible to use the agent with a Windows subsystem for Linux.
- Pure Python PGP implementation, this feature will permit use on systems where GPG is not installed. If GPG is not found PGPy will be used for OpenPGP support.
GPG Agent FAQ
How do I generate a keys for a second identity?
You can only have one identity located in default location ~/.gnupg/onlykey. However, you can specify additional locations when creating identities i.e.
$ onlykey-gpg init "test test <[email protected]>" -v --homedir /Users/t/.gnupg/onlykey/test2
How do I add new user ID to existing identity?
After your main identity is created, you can add new user IDs using the regular GnuPG commands:
$ onlykey-gpg init "Foobar" -vv
$ export GNUPGHOME=${HOME}/.gnupg/onlykey
$ gpg2 -K
------------------------------------------
sec   nistp256/6275E7DA 2017-12-05 [SC]
uid         [ultimate] Foobar
ssb   nistp256/35F58F26 2017-12-05 [E]

$ gpg2 --edit Foobar
gpg> adduid
Real name: Xyzzy
Email address:
Comment:
You selected this USER-ID:
    "Xyzzy"

Change (N)ame, (C)omment, (E)mail or (O)kay/(Q)uit? o

gpg> save

$ gpg2 -K
------------------------------------------
sec   nistp256/6275E7DA 2017-12-05 [SC]
uid         [ultimate] Xyzzy
uid         [ultimate] Foobar
ssb   nistp256/35F58F26 2017-12-05 [E]
How do I set key expiration?
Using the regular GnuPG commands, set an expiration date:
$ gpg --list-keys
pub   ed25519 2016-10-29 [SC] [expires: 2023-01-26]
      91EBE9BC618785293A2DE567417B8043D29B1315
uid           [ultimate] test test <[email protected]>
sub   cv25519 2016-10-29 [E]
$ gpg --edit-key 91EBE9BC618785293A2DE567417B8043D29B1315
gpg> key 0
gpg> expire
Changing expiration time for the primary key.
Please specify how long the key should be valid.
         0 = key does not expire
      <n>  = key expires in n days
      <n>w = key expires in n weeks
      <n>m = key expires in n months
      <n>y = key expires in n years
Key is valid for? (0) 2y
Key expires at Thu Jan 26 13:52:51 2023 EST
Is this correct? (y/N) y
gpg> quit
Save changes? (y/N) y
How do I export my derived private key?
Since your private key only exists temporarily on the OnlyKey while it’s being used, you can’t export it. You can however back up your OnlyKey and restore to another OnlyKey which would then be able to derive the same private key, given the same init command is used i.e.
onlykey-gpg init "Bob Smith <[email protected]>"
If you need to use keys that you can export you can use the stored keys and back up your PGP/GPG key prior to loading it onto OnlyKey.
How do I create a different derived private key using same identity?
By default your identity is created with time (-t) set to 0 (1970-01-01) which makes it easy to recreate this key without the need for anything except OnlyKey and remember the identity.
$ onlykey-gpg init "test test <[email protected]>"
...
sec   ed25519 1970-01-01 [SC]
      B258DFB2449E70E186DAF436C5E39756DB40B5AE
uid           [ultimate] test test <[email protected]>
ssb   cv25519 1970-01-01 [E]
There is also the option to specify a time, which will use the same identity create a different key i.e.
$ onlykey-gpg init "test test <[email protected]>" -t 1477727920
...
sec   ed25519 2016-10-29 [SC]
      91EBE9BC618785293A2DE567417B8043D29B1315
uid           [ultimate] test test <[email protected]>
ssb   cv25519 2016-10-29 [E]
Here to recreate the identity the time (-t 1477727920) must be remembered.
How do I sign and decrypt email?
Follow instructions here
How do I start the agent as a systemd unit?
1. Create these files in ~/.config/systemd/user
onlykey-gpg-agent.service
[Unit]
Description=onlykey-gpg-agent
Requires=onlykey-gpg-agent.socket

[Service]
Type=simple
Environment="GNUPGHOME=%h/.gnupg/onlykey"
Environment="PATH=/bin:/usr/bin:/usr/local/bin:%h/.local/bin"
ExecStart=/usr/bin/onlykey-gpg-agent -vv
If you’ve installed onlykey-agent locally you may have to change the path in ExecStart=.
onlykey-gpg-agent.socket
[Unit]
Description=onlykey-gpg-agent socket

[Socket]
ListenStream=%t/gnupg/S.gpg-agent
FileDescriptorName=std
SocketMode=0600
DirectoryMode=0700

[Install]
WantedBy=sockets.target
2. Stop onlykey-gpg-agent if it’s already running
killall onlykey-gpg-agent
3. Run
systemctl --user start onlykey-gpg-agent.service onlykey-gpg-agent.socket
systemctl --user enable onlykey-gpg-agent.socket
Advanced Options
Supported Key Types
X25519
By default OnlyKey agent uses X25519 keys but also supports NIST256P1 and RSA keys.
NIST256P1
1) Generate NIST256P1 SSH public key using onlykey-agent
Derived key:
$ onlykey-agent user@host -e nist256p1
Stored key:
$ onlykey-agent user@host -e nist256p1 -sk ECC2
2) SSH login in using nist256p1
Derived key:
$ onlykey-agent -c user@host -e nist256p1
Stored key:
$ onlykey-agent -c user@host -sk ECC2 -e nist256p1
4) GPG init using nist256p1
Derived key:
$ onlykey-gpg init "Bob Smith <[email protected]>" -e nist256p1
Stored key:
$ onlykey-gpg init "Bob Smith <[email protected]>" -sk ECC2 -dk ECC1 -i [email protected] -e nist256p1
RSA
1) Generate RSA SSH public key using onlykey-agent
Stored key:
$ onlykey-agent user@host -e rsa -sk RSA2
2) SSH login in using RSA
Stored key:
$ onlykey-agent -c user@host -e rsa -sk RSA2
Load Existing OpenSSH Private Key (Stored Keys)
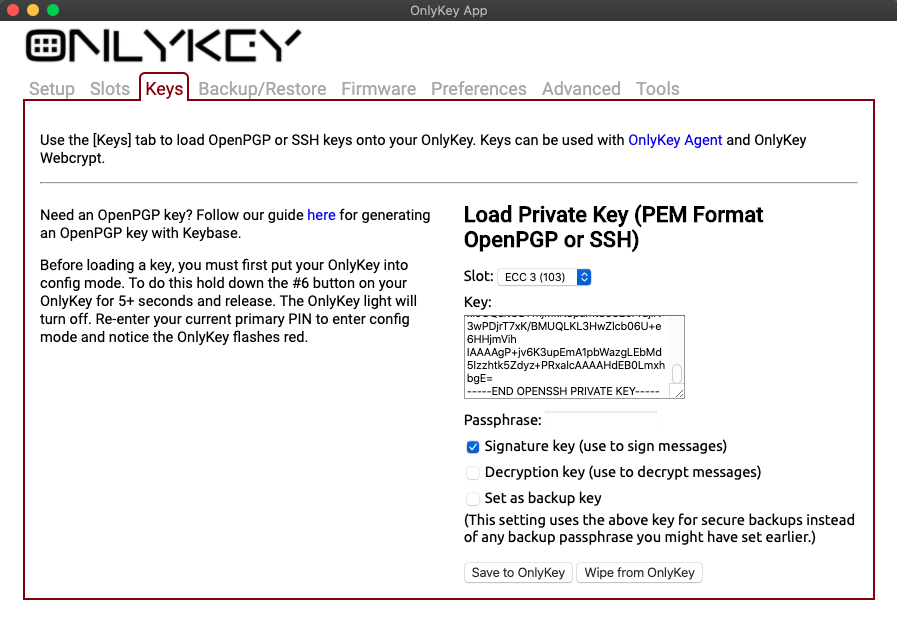
For the SSH Agent you can load existing OpenPGP keys or existing OpenSSH keys in the keys tab of the OnlyKey app. To load OpenSSH key:
- Copy the PEM format OpenSSH private key contents (i.e. from ~/.ssh/id_rsa or ~/.ssh/id_ecdsa or ~/.ssh/id_ed25519)
- Paste contents into ‘Key:’ field
- Enter Passphrase if one is required
- Put OnlyKey into config mode and select ‘Save to OnlyKey’
By default this loads your RSA OpenSSH key into RSA2 or your ECC OpenSSH key into slot ECC2. To specify a custom slot change ‘Slot:’ from ‘Auto Load’ to desired slot number, check ‘Signature key’ box, click ‘Save to OnlyKey’:

Then to export your public key from OnlyKey:
onlykey-agent user@host -sk ECC2
or
onlykey-agent user@host -e rsa -sk RSA2
Setting Derived Key User Input Mode
Currently it is not possible to display the 3 digit challenge code to user through GPG. This feature is on the roadmap. To use derived keys with GPG go to preferences in the OnlyKey app and set ‘Derived Key User Input Mode’ to ‘Button Press Required’.
Setting Stored Key User Input Mode
Currently it is not possible to display the 3 digit challenge code to user through GPG. This feature is on the roadmap. To use derived keys with GPG go to preferences in the OnlyKey app and set ‘Stored Key User Input Mode’ to ‘Button Press Required’.
Edit me
