# OnlyKey Docs - Full Context > Generated by docmd Documentation for OnlyKey hardware security tokens by CryptoTrust. --- ## [Page Not Found](https://docs.onlykey.io/404/) --- title: Page Not Found slug: 404 --- Sorry, but the page you were trying to view does not exist. Try searching for it or looking at the URL to see if it looks correct. --- ## [Using OnlyKey with Windows Active Directory and Azure AD](https://docs.onlykey.io/activedirectory/) --- title: Using OnlyKey with Windows Active Directory and Azure AD description: How to use OnlyKey with Windows Active Directory and Azure AD for 2-factor Authentication and Protection from Ransomware slug: activedirectory last_updated: June, 24, 2021 keywords: OnlyKey, Azure, Active Directory, Windows --- ## Windows Active Directory Support Windows Active Directory provides centralized administration of servers, workstations, users, and applications. There are different types of Active Directory and OnlyKey supports the different types in different ways. ### Local Active Directory (AD) This is the traditional Active Directory model where there is a direct network connection between Windows workstations and an Active Directory Domain Controller. Local AD does not support FIDO security keys and typically users log in via password authentication. 3rd party 2-factor authentication solutions such as Authlite may be used to implement 2-factor authentication. OnlyKey can be used with Local AD in two ways: **1) Strong Passwords (Medium Strength)** - OnlyKey can be used to store strong and complex passwords for Windows authentication. OnlyKey supports up to 56 character long random passwords which prevent successful password cracking. OnlyKey can also be used to store passwords for multiple accounts which allows proper least privilege account provisioning i.e. if Bob is a system administrator he may be provisioned with three accounts which can all be stored on OnlyKey: - Unprivileged User Account - Bob uses this to login and perform daily tasks like checking email - Local Administrator Account - Bob uses this to login to other systems to perform system maintenance - Domain Administrator Account - Bob uses this to login only to log into the domain controller Separate provisioning of accounts is an essential part of a zero-trust security model and can protect against attacks like ransomware, more information on that [here](#ransomware). **2) Authlite 2-Factor Authentication (High Strength)** - OnlyKey can be used to generate one-time passwords used with Authlite Windows authentication. Authlite supports OnlyKey and is an affordable two-factor authentication solution for Active Directory, more information available at [authlite.com](https://www.authlite.com/). Why Authlite instead of one of the other solutions? - Authlite supports physical security keys like OnlyKey - Authlite fails closed, this is unlike DUO which may in many cases be bypassed (i.e. boot into safe mode) - Authlite does not require contact with external service, works offline, and only requires install of software on domain controller - Like OnlyKey, Authlite is a one-time cost per user ### Azure Active Directory (AAD) This is a cloud Active Directory model where there is not a direct network connection between Windows workstations and a server but rather an internet connection to remote Azure AD. Windows does support a built-in feature for 2-factor authentication via the Microsoft Authenticator app and physical security keys. OnlyKey is compliant and supported as a physical security key on Azure AD. To deploy security keys on Azure AD some configuration is required: 1) First identify which users will be permitted to authenticate via the Microsoft Authenticator app and which users will be required to log in via physical security key. A model that works well for most organizations is to permit Microsoft Authenticator app to be used for most unprivileged users and to require a physical security key for administrators. 2) Once the target user group has been created go to Azure AD Security settings -> Authentication methods and create an Authentication method policy ![Azure AD Authentication methods](/assets/authentication.png) 3) Select "Add AAGUID" under "Restrict specific keys" and add OnlyKey's AAGUID `998f358b-2dd2-4cbe-a43a-e8107438dfb3` ## Threat Models Mitigated with OnlyKey Protected Windows Accounts ### Ransomware Protection {#ransomware} While centralized administration of servers, workstation, and users is a powerful tool for system administrators it can also be a powerful tool for adversaries should account compromise occur. When a privileged account is compromised the same features that allow a legitmate administrator to remotely access systems can allow ransomware to move laterally between systems where it can then encrypt and steal sensitive files. Here are the steps in a typical ransomware attack: 1. A user clicks a malicious link in an email which installs malware such as the Emotet trojan. 2. The Emotet trojan is used to infect the system with [Trickbot](https://blog.malwarebytes.com/detections/trojan-trickbot/) or other malware that gathers Windows user password hashes from network and systems and sends them back to the attacker. 3. These password hashes are then run through a password cracking appliance that uses combinations of words, numbers, and special characters to crack passwords. Passwords such as Summer2019! and Welcome2020# are cracked almost immediately while other more complex passwords take longer. 4. Once a workstation or server admin account is compromised the credential is used to install ransomware such as [Ryuk](https://www.crowdstrike.com/blog/big-game-hunting-with-ryuk-another-lucrative-targeted-ransomware/) on all accessible (Active Directory) client systems. A ransom that can be up to millions of dollars is demanded to restore client data that is encrypted. Many victims of ransomware may never recover and may even have to close down after an attack. The one key weakness exploited in a ransomware attack is most commonly passwords. OnlyKey stores long random passwords that are stored offline on a physical key fob. By using long random passwords ransomware is unable to crack passwords. Going a step further and using a 2-factor authentication solution like Authlite provides an even more robust solution for protection of accounts. --- ## [OnlyKey App](https://docs.onlykey.io/app/) --- title: OnlyKey App description: The OnlyKey App is used for the initial setup and configuration of OnlyKey. Supported on Windows, macOS, and Linux. slug: app last_updated: Dec, 7, 2023 keywords: OnlyKey, App --- # OnlyKey App This is the official app for **OnlyKey** OnlyKey can be purchased here: [OnlyKey order](https://onlykey.io/products) ## About **OnlyKey App** is an app to be used along with an OnlyKey device. The app is used for things like: - Initial setup of OnlyKey (PINs) - Configuration of accounts (Slots) - Loading keys for OpenPGP and secure backup (Keys) - Backup and restore of OnlyKey (Backup/Restore) - Setting OnlyKey preferences (Preferences) - Setting advanced options (Advanced) *The app is required on all systems where Google Authenticator (TOTP) is used* For information on using the app with OnlyKey see the [OnlyKey User's Guide](/usersguide) ### Install OnlyKey App {#app-desktop} :::callout **Step 1.** Download installer ::: ::: tabs == tab macOS [**Download for macOS**](https://github.com/trustcrypto/OnlyKey-App/releases/download/v5.3.6/OnlyKey.App.5.3.6.dmg) == tab Windows [**Download for Windows**](https://github.com/trustcrypto/OnlyKey-App/releases/download/v5.3.6/OnlyKey_5.3.6.exe) There is also a portable version [here](https://github.com/trustcrypto/OnlyKey-App/releases/download/v5.3.6/OnlyKey_Portable_5.3.6.exe), which permits using the OnlyKey App in enterprise environments where users may not have admin rights. == tab Linux [**Download for Linux**](https://github.com/trustcrypto/OnlyKey-App/releases/download/v5.5.0/OnlyKey_5.5.0_amd64.deb) If a UDEV rule has not been created previously, follow the instructions [here](/linux). The OnlyKey app may also be installed via snapcraft - [Linux Guide](/linux). ::: :::callout **Step 2.** Install and launch the app. ::: :::tip "๐Ÿ’ก Pro Tip" You can ensure the integrity of your downloaded file by verifying the checksum.
macOS SHA 256 CHECKSUM: 1f7756227af0752bf2d1071bf6f04e5a3282df54ac0125fdfb4abfab7edb115a
Windows SHA 256 CHECKSUM: 22fc0b80d0b11fa5b0f9a566ae11edb8aee41e53905259e2a8a948c71e45e1fe
Linux SHA 256 CHECKSUM: f00f056a3432d624a805596a6c6b0f2ce5d8efa8c95da1baac39599946301065
[ **Linux App GPG Public Key**](https://github.com/trustcrypto/OnlyKey-App/releases/download/v5.3.0/CryptoTrust_LLC_pub.asc) A1D6 4A3B 496C B0F3 6E12 B46F 9A9F 520D 44EA 53D1 ::: If you have an OnlyKey to set up, once you have installed the app proceed to [OnlyKey Setup](/usersguide#onlykey-setup) ### OnlyKey Chrome App {#onlykey-chrome-app} :::warning "โš ๏ธ No Longer Supported" The OnlyKey Chrome App is **deprecated**. Google has ended support for Chrome Apps โ€” ChromeOS 138 (July 2025) was the last ChromeOS release that supported user-installed Chrome apps, and Chrome Apps were removed from desktop Chrome, Chromium, Brave, and Edge in earlier releases. Use the desktop OnlyKey App for macOS, Windows, or Linux instead. The instructions below are retained for reference only. ::: The Chrome app has limited features and was only intended for use where the desktop app is unavailable, such as on ChromeOS or unsupported ARM based operating systems. ### ChromeOS :::callout **Step 1.** Open the Chrome (Chromium, Brave, Edge) Web Browser. If you do not have the chrome web browser installed you can install this by following the instructions here: [https://www.google.com/chrome/browser/desktop/](https://www.google.com/chrome/browser/desktop/) ::: :::callout **Step 2.** Click [here](https://chrome.google.com/webstore/detail/onlykey-configuration/adafilbceehejjehoccladhbkgbjmica) to browse to the OnlyKey Configuration Web app on the Chrome Web Store and select 'Add to Chrome' ::: ![](/assets/image41.png) :::callout **Step 3.** When prompted select ''Add App'' ::: ![](/assets/image12.png) :::callout **Step 4.** To launch the OnlyKey Configuration App select the top right menu icon -> Bookmarks -> Show Bookmarks Bar to enable the bookmarks bar to become visible. Then select the Apps icon (Or alternatively browse to ''chrome://apps/'') and then select the ''OK'' icon to launch the OnlyKey App. ::: ![](/assets/image33.png)

![](/assets/image17.png)

### ARM Operating Systems :::callout **Step 1.** Download the OnlyKey Chrome App Zip file [here](https://github.com/trustcrypto/OnlyKey-App/releases/download/v5.3.6/OnlyKey_Chrome_App.zip). ::: :::callout **Step 2.** Go to the Extensions settings in your Chrome, Edge, or Brave browser (chrome://extensions, edge://extensions, or brave://extensions) and select 'Developer Mode' to enable loading extensions ::: :::callout **Step 3.** Unzip the OnlyKey Chrome App Zip file and select 'Load Unpacked' on the Extensions screen. Select the OnlyKey_Chrome_App folder, this will load the unpacked OnlyKey Chrome App. ::: ## Support Check out the [OnlyKey Support Forum](https://forum.onlykey.io) Check out the [OnlyKey Documentation](https://docs.onlykey.io) ## Source [OnlyKey App on Github](https://github.com/trustcrypto/OnlyKey-App) --- ## [OnlyKey Command-Line Utility](https://docs.onlykey.io/command-line/) --- title: OnlyKey Command-Line Utility description: The OnlyKey Command-Line Utility is a command line interface to OnlyKey. slug: command-line last_updated: Jan, 19, 2022 keywords: OnlyKey, Command line --- # onlykey-cli OnlyKey-cli - A command line interface to the OnlyKey (Similar functionality to [OnlyKey App](/app)) that can be used for configuration, scripting, and testing. ## Installation ::: tabs == tab Windows **Stand-alone EXE (no install required)** โ€” download and run the EXE to open OnlyKey CLI interactive mode, or run it directly from the command line: ``` C:\ onlykey-cli.exe getlabels ``` [Download the EXE here](https://github.com/trustcrypto/python-onlykey/releases/download/v1.2.9/onlykey-cli.exe) **Install with dependencies** 1. Python 3.8 and pip3 are required. To set up a Python environment on Windows we recommend Anaconda: [https://www.anaconda.com/download/#windows](https://www.anaconda.com/download/#windows) 2. From an administrator command prompt run: ``` pip3 install hidapi==0.9.0 onlykey ``` You should see a message showing where the executable is installed. This is usually `c:\python39\scripts\onlykey-cli.exe` == tab macOS Python 3.8 and pip3 are required. To set up a Python environment on macOS we recommend Anaconda: [https://www.anaconda.com/download/#macos](https://www.anaconda.com/download/#macos) ``` $ brew install libusb $ pip3 install onlykey ``` == tab Linux / BSD In order for non-root users in Linux to be able to communicate with OnlyKey, a udev rule must be created as described [here](/linux). #### Ubuntu / Debian :::note Since Debian 12 "bookworm" and Ubuntu 23.04, the system Python is marked externally-managed ([PEP 668](https://peps.python.org/pep-0668/)), so installing into the system Python with `pip3 install onlykey` is blocked. Install with **pipx** (recommended) or inside a **virtual environment** instead. Other distributions that enforce PEP 668 should follow the same approach. ::: **Option A โ€” pipx (recommended)** ``` $ sudo apt update && sudo apt upgrade $ sudo apt install pipx python3-tk libusb-1.0-0-dev libudev-dev $ pipx install --system-site-packages onlykey $ pipx ensurepath $ wget https://raw.githubusercontent.com/trustcrypto/trustcrypto.github.io/pages/49-onlykey.rules $ sudo cp 49-onlykey.rules /etc/udev/rules.d/ $ sudo udevadm control --reload-rules && udevadm trigger ``` **Option B โ€” virtual environment (venv)** ``` $ sudo apt update && sudo apt upgrade $ sudo apt install python3-pip python3-venv python3-tk libusb-1.0-0-dev libudev-dev $ python3 -m venv ~/onlykey-venv $ ~/onlykey-venv/bin/pip3 install onlykey $ wget https://raw.githubusercontent.com/trustcrypto/trustcrypto.github.io/pages/49-onlykey.rules $ sudo cp 49-onlykey.rules /etc/udev/rules.d/ $ sudo udevadm control --reload-rules && udevadm trigger ``` With venv, run the CLI as `~/onlykey-venv/bin/onlykey-cli` (or `source ~/onlykey-venv/bin/activate` first, then use `onlykey-cli` directly). #### RedHat ``` $ yum update $ yum install python3-pip python3-devel python3-tk libusb-devel libudev-devel \ gcc redhat-rpm-config $ pip3 install onlykey $ wget https://raw.githubusercontent.com/trustcrypto/trustcrypto.github.io/pages/49-onlykey.rules $ sudo cp 49-onlykey.rules /etc/udev/rules.d/ $ sudo udevadm control --reload-rules && udevadm trigger ``` #### Fedora ``` $ dnf install python3-pip python3-devel python3-tkinter libusb-devel libudev-devel \ gcc redhat-rpm-config $ pip3 install onlykey $ wget https://raw.githubusercontent.com/trustcrypto/trustcrypto.github.io/pages/49-onlykey.rules $ sudo cp 49-onlykey.rules /etc/udev/rules.d/ $ sudo udevadm control --reload-rules && udevadm trigger ``` #### OpenSUSE ``` $ zypper install python3-pip python3-devel python3-tk libusb-1_0-devel libudev-devel $ pip3 install onlykey $ wget https://raw.githubusercontent.com/trustcrypto/trustcrypto.github.io/pages/49-onlykey.rules $ sudo cp 49-onlykey.rules /etc/udev/rules.d/ $ sudo udevadm control --reload-rules && udevadm trigger ``` #### Arch Linux ``` $ sudo pacman -Sy git python3-setuptools python3 libusb python3-pip $ pip3 install onlykey $ wget https://raw.githubusercontent.com/trustcrypto/trustcrypto.github.io/pages/49-onlykey.rules $ sudo cp 49-onlykey.rules /etc/udev/rules.d/ $ sudo udevadm control --reload-rules && udevadm trigger ``` #### FreeBSD See the forum thread [here](https://groups.google.com/d/msg/onlykey/CEYwdXjB508/MCe14p0gAwAJ). ::: ## QuickStart Usage: onlykey-cli [OPTIONS] ### Setup Options #### init A command line tool for setting PIN on OnlyKey (Initial Configuration) ### General Options #### version Displays the version of the app #### fwversion Displays the version of the OnlyKey firmware #### wink OnlyKey flashes blue (winks), may be used for visual confirmation of connectivity #### getlabels Returns slot labels #### settime A command for setting time on OnlyKey, time is needed for TOTP (Google Authenticator) #### getkeylabels Returns key labels for RSA keys 1-4 and ECC keys 1-16 #### rng [type] Access OnlyKey TRNG to generate random numbers: - [type] must be one of the following: - hexbytes - Output hex encoded random bytes. Default 8 bytes; Maximum 255 bytes. Specify number of bytes to return with --count i.e. 'onlykey-cli rng hexbytes --count 32' - feedkernel - Feed random bytes to /dev/random. ### OnlyKey Preferences Options #### idletimeout [num] OnlyKey locks after ideletimeout is reached (1 โ€“ 255 minutes; default = 30; 0 to disable). [More info](/usersguide#configurable-inactivity-lockout-period) #### wipemode [num] Configure how the OnlyKey responds to a factory reset. WARNING - Setting to Full Wipe mode cannot be changed. 1 = Sensitive Data Only (default); 2 = Full Wipe (recommended for plausible deniability users) Entire device is wiped. Firmware must be reloaded. [More info](/usersguide#configurable-wipe-mode) #### keylayout [num] {#keylayout} Set keyboard layout - 1 - USA_ENGLISH (Default) - 2 - CANADIAN_FRENCH - 3 - CANADIAN_MULTILINGUAL - 4 - DANISH - 5 - FINNISH - 6 - FRENCH - 7 - FRENCH_BELGIAN - 8 - FRENCH_SWISS - 9 - GERMAN - 10 - GERMAN_MAC - 11 - GERMAN_SWISS - 12 - ICELANDIC - 13 - IRISH - 14 - ITALIAN - 15 - NORWEGIAN - 16 - PORTUGUESE - 17 - PORTUGUESE_BRAZILIAN - 18 - SPANISH - 19 - SPANISH_LATIN_AMERICA - 20 - SWEDISH - 21 - TURKISH - 22 - UNITED_KINGDOM - 23 - US_INTERNATIONAL - 24 - CZECH - 25 - SERBIAN_LATIN_ONLY - 26 - HUNGARIAN - 27 - DANISH MAC - 28 - US_DVORAK [More info](/usersguide#configurable-keyboard-layouts) #### keytypespeed [num] 1 = slowest; 10 = fastest [7 = default] [More info](/usersguide#configurable-keyboard-type-speed) #### ledbrightness [num] 1 = dimmest; 10 = brightest [8 = default] [More info](/usersguide#configurable-led-brightness) #### touchsense [num] Change the OnlyKey's button touch sensitivity. WARNING: Setting button's touch sensitivity lower than 5 is not recommended as this could result in inadvertent button press. 2 = highest sensitivity; 100 = lowest sensitivity [12 = default] #### 2ndprofilemode [num] Set during init (Initial Configuration) to set 2nd profile type 1 = standard (default); 2 = plausible deniability #### storedkeymode [num] Enable or disable challenge for stored keys (SSH/PGP) 0 = Challenge Code Required (default); 1 = Button Press Required [More info](/usersguide#stored-challenge-mode) #### derivedkeymode [num] Enable or disable challenge for stored keys (SSH/PGP) 0 = Challenge Code Required (default); 1 = Button Press Required [More info](/usersguide#derived-challenge-mode) #### hmackeymode [num] Enable or disable button press for HMAC challenge-response 0 = Button Press Required (default); 1 = Button Press Not Required. [More info](/usersguide#hmac-mode) #### backupkeymode [num] 1 = Lock backup key so this may not be changed on device WARNING - Once set to "Locked" this cannot be changed unless a factory reset occurs. [More info](/usersguide#backup-key-mode) #### sysadminmode Enable or disable challenge for stored keys (SSH/PGP) 0 = Challenge Code Required (default); 1 = Button Press Required [More info](/usersguide#derived-challenge-mode) #### lockbutton Enable or disable challenge for stored keys (SSH/PGP) 0 = Challenge Code Required (default); 1 = Button Press Required [More info](/usersguide#derived-challenge-mode) ### Slot Config Options #### setslot [id] [type] [value] - [id] must be slot number 1a - 6b for OnlyKey or 1-24 for OnlyKey DUO - [type] must be one of the following: - label - set slots (1a - 6b) to have a descriptive label i.e. My Google Acct - url - URL to login page - delay1 - set a 0 - 9 second delay - addchar1 - Additional character before username 1 for TAB, 0 to clear - username - Username to login - addchar2 - Additional character after username 1 for TAB, 2 for RETURN - delay2 - set a 0 - 9 second delay - password - Password to login - addchar3 - Additional character after password 1 for TAB, 2 for RETURN - delay3 - set a 0 - 9 second delay - addchar4 - Additional character before OTP 1 for TAB - 2fa - type of two factor authentication - g - Google Authenticator - y - Yubico OTP - u - U2F - totpkey - Google Authenticator key - addchar5 - Additional character after OTP 2 for RETURN #### wipeslot [id] - [id] must be slot number 1a - 6b for OnlyKey or 1-24 for OnlyKey DUO ### Key Config Options #### setkey [key slot] [type] [features] [hex key] Sets raw private keys and key labels, to set PEM format keys use the OnlyKey App - [key slot] must be key number RSA1 - RSA4, ECC1 - ECC16, HMAC1 - HMAC2 - [type] must be one of the following: - label - set to have a descriptive key label i.e. My GPG signing key - x - X25519 Key Type (32 bytes) - n - NIST256P1 Key Type (32 bytes) - s - SECP256K1 Key Type (32 bytes) - 2 - RSA Key Type 2048bits (256 bytes) - 4 - RSA Key Type 4096bits (512 bytes) - h - HMAC Key Type (20 bytes) - [features] must be one of the following: - s - Use for signing - d - Use for decryption - b - Use for encryption/decryption of backups - For setting keys see examples [here](/command-line#writing-private-keys-and-passwords). #### genkey [key slot] [type] [features] Generates random private key on device - [key slot] must be key number ECC1 - ECC16 (only ECC keys supported) - [type] must be one of the following: - x - X25519 Key Type (32 bytes) - n - NIST256P1 Key Type (32 bytes) - s - SECP256K1 Key Type (32 bytes) - [features] must be one of the following: - s - Use for signing - d - Use for decryption - b - Use for encryption/decryption of backups - For generating key see example [here](/command-line#writing-private-keys-and-passwords). #### wipekey [key id] Erases key stored at [key id] - [key id] must be key number RSA1 - RSA4, ECC1 - ECC16, HMAC1 - HMAC2 ### FIDO2 Config Options #### ping Sends a FIDO2 transaction to the device, which immediately echoes the same data back. This command is defined to be a uniform function for debugging, latency and performance measurements (CTAPHID_PING). #### set-pin Set new FIDO PIN, this is the PIN entered via keyboard and used for FIDO2 register/login (not the OnlyKey PIN entered on device). #### change-pin Change FIDO PIN, this is the PIN entered via keyboard and used for FIDO2 register/login (not the OnlyKey PIN entered on device, to change that PIN use the OnlyKey Desktop App). #### credential [operation] [credential ID] - [operation] must be one of the following: - info - Display number of existing resident keys and remaining space. - ls - List resident keys. - rm [credential ID] - Remove resident keys, [example here](/command-line#list-and-remove-fido2-resident-key). #### reset Reset wipes all FIDO U2F and FIDO2 credentials!!! It is highly recommended to backup device prior to reset. ### Running Command Options You can run commands in two ways: #### 1) Directly in terminal Like this: ``` $ onlykey-cli getlabels Slot 1a: Slot 1b: Slot 2a: Slot 2b: Slot 3a: Slot 3b: Slot 4a: Slot 4b: Slot 5a: Slot 5b: Slot 6a: Slot 6b: $ onlykey-cli setslot 1a label ok Successfully set Label $ onlykey-cli getlabels Slot 1a: ok Slot 1b: Slot 2a: Slot 2b: Slot 3a: Slot 3b: Slot 4a: Slot 4b: Slot 5a: Slot 5b: Slot 6a: Slot 6b: ``` #### 2) Interactive Mode Or you can run commands in an interactive shell like this: ``` $ onlykey-cli OnlyKey CLI v1.2.8 Press the right arrow to insert the suggestion. Press Control-C to retry. Control-D to exit. OnlyKey> getlabels Slot 1a: Slot 1b: Slot 2a: Slot 2b: Slot 3a: Slot 3b: Slot 4a: Slot 4b: Slot 5a: Slot 5b: Slot 6a: Slot 6b: OnlyKey> setslot 1a label ok Successfully set Label OnlyKey> getlabels Slot 1a: ok Slot 1b: Slot 2a: Slot 2b: Slot 3a: Slot 3b: Slot 4a: Slot 4b: Slot 5a: Slot 5b: Slot 6a: Slot 6b: OnlyKey> setslot 1a url accounts.google.com Successfully set URL OnlyKey> setslot 1a addchar1 2 Successfully set Character1 OnlyKey> setslot 1a delay1 2 Successfully set Delay1 OnlyKey> setslot 1a username onlykey.1234 Successfully set Username OnlyKey> setslot 1a addchar2 2 Successfully set Character2 OnlyKey> setslot 1a delay2 2 Successfully set Delay2 OnlyKey> setslot 1a password Type Control-T to toggle password visible. Password: ********* Successfully set Password OnlyKey> setslot 1a addchar3 2 Successfully set Character3 OnlyKey> setslot 1a delay3 2 Successfully set Delay3 OnlyKey> setslot 1a 2fa g Successfully set 2FA Type OnlyKey> setslot 1a totpkey Type Control-T to toggle password visible. Password: ******************************** Successfully set TOTP Key OnlyKey> setslot 1a addchar4 2 Successfully set Character4 OnlyKey> Bye! ``` ## Examples ### Writing Private Keys and Passwords {#writing-private-keys-and-passwords} Keys/passwords are masked when entered and should only be set from interactive mode and not directly from terminal. Entering directly from terminal is not secure as command history is stored. **Setkey Examples** To set key a device must first be put into config mode. **Set HMAC key 1 to a custom value** $ onlykey-cli OnlyKey> setkey HMAC1 h Type Control-T to toggle password visible. Password/Key: **************************************** Successfully set ECC Key *HMAC key must be 20 bytes, h is HMAC type* **Set HMAC key 2 to a custom value** $ onlykey-cli OnlyKey> setkey HMAC2 h Type Control-T to toggle password visible. Password/Key: **************************************** Successfully set ECC Key *HMAC key must be 20 bytes, h is HMAC type* **Set ECC key in slot ECC1 to a custom value (Slots ECC1-ECC16 are available for ECC keys. Supported ECC curves X25519(x), NIST256P1(n), SECP256K1(s))** $ onlykey-cli OnlyKey> setkey ECC1 x Type Control-T to toggle password visible. Password/Key: ************************************************************* Successfully set ECC Key *ECC key must be 32 bytes, x is X25519 type* **Genkey Examples** To set key a device must first be put into config mode. **Generate ECC key in slot ECC1 to a custom value (Slots ECC1-ECC16 are available for ECC keys. Supported ECC curves X25519(x), NIST256P1(n), SECP256K1(s))** $ onlykey-cli OnlyKey> genkey ECC1 x Successfully set ECC Key ### Scripting Example **Set time on OnlyKey (required for TOTP)** $ onlykey-cli settime This can be added to scripts such as the UDEV rule to automatically set time when device is inserted into USB port. See example [here](https://raw.githubusercontent.com/trustcrypto/trustcrypto.github.io/pages/49-onlykey.rules) **Scripted provisioning of an OnlyKey slots and keys can be done by creating a script that sets multiple values on OnlyKey** ### List and Remove FIDO2 Resident Key {#list-and-remove-fido2-resident-key} List current resident keys: ``` onlykey-cli credential ls ``` ![](/assets/cli-cred-ls.png) Remove a resident key by credential ID ``` onlykey-cli credential rm eu7LPIjTNwIJt2Ws9LWJlXkiNKaueSEEGteZM2MT/lZtEuYo49V6deCiIRMb6EDC29XG13nBL60+Yx+6hxSUYS1uxX9+AA== ``` Once removed, list current resident keys to verify: ![](/assets/cli-cred-ls2.png) ## Source [OnlyKey CLI on Github](https://github.com/trustcrypto/python-onlykey) --- ## [OnlyKey DUO User's Guide](https://docs.onlykey.io/duousersguide/) --- title: "OnlyKey DUO User's Guide" description: "The user's guide provides step-by-step instructions for configuring and using OnlyKey DUO." slug: duousersguide last_updated: Dec, 28, 2022 keywords: "OnlyKey, DUO, User's Guide" --- ## Start Here - Unpacking OnlyKey DUO {#unpacking} ::: steps 1. Remove the OnlyKey and the metal quick-connect keychain from packaging. 2. Attach the quick-connect to the OnlyKey; the other end of the quick-connect can be attached to your keyring. 3. (Optional) Check out OnlyKey accessories โ€” [iPhone user's mobile adapter (Lightning)](https://onlykey.io/collections/accessories-1). ::: ***Proceed to setup below*** ## Setting up OnlyKey {#initial-setup} If you wish to just use your OnlyKey DUO as a FIDO security key (webauthn) then no additional setup is required. Register your OnlyKey DUO, then use to login. This is supported by major websites such as Microsoft, Google, Facebook, and GitHub. If you wish to use your OnlyKey as a hardware password manager, enable other methods of two-factor authentication, or enable secure backup of your device setup OnlyKey DUO with the OnlyKey App. ***Proceed to install app below*** ### Install OnlyKey Desktop App {#app-desktop} :::callout **Step 1.** Download installer ::: ::: tabs == tab macOS [**Download for macOS**](https://github.com/trustcrypto/OnlyKey-App/releases/download/v5.3.6/OnlyKey.App.5.3.6.dmg) == tab Windows [**Download for Windows**](https://github.com/trustcrypto/OnlyKey-App/releases/download/v5.3.6/OnlyKey_5.3.6.exe) == tab Linux [**Download for Linux**](https://github.com/trustcrypto/OnlyKey-App/releases/download/v5.5.0/OnlyKey_5.5.0_amd64.deb) If a UDEV rule has not been created previously, follow the instructions [here](/linux). The OnlyKey app may also be installed via snapcraft - [Linux Guide](/linux). ::: :::callout **Step 2.** Install and launch the app. ::: :::tip "๐Ÿ’ก Pro Tip" As you use the OnlyKey app you can hover over icons for tooltips and click on icon's to browse to that topic in the documentation ![](/assets/tooltip.png) ::: ***Proceed to OnlyKey setup below*** ### Setup Using OnlyKey App {#onlykey-setup} ::: steps 1. Insert OnlyKey DUO. If you would like to set advanced features such as a device PIN, select the advanced checkbox. ![](/assets/config1-duo.png) 2. Select [Next] and follow the instructions to enter a backup passphrase. ![](/assets/setup7-2.png) 3. If you have an OnlyKey backup to restore, select [Choose File], select your OnlyKey backup file, and then select [Next] to load it onto your OnlyKey. If you do not have a backup, just select [Next] to complete the setup. ![](/assets/setup10.png) ::: Your device is now set up and will automatically reboot. ## Reset/Factory Default Device {#reset-default} If you ever need to wipe and restore your OnlyKey DUO to factory defaults you can do that by holding down button #1 on device for 10 seconds (device will flash red) then hold down button #2 for 20 seconds. All data on your device will be wiped and you can go through setup again. You can also use the Self-destruct PIN if one has been set. ***Proceed to setup accounts below*** ## Setting up accounts {#account-setup} Prefer a how-to video? Watch one [here](https://vimeo.com/967163806) that demonstrates setting up a new OnlyKey ::: embed https://vimeo.com/967163806 ### Configure Basic Login Info {#all-about-slots} The Slots area of the application is where you will set up things like passwords and two-factor authentication. You can see the word ''empty'' is shown next to a button with a number and a letter. Each of these buttons refer to one of the slots on your OnlyKey. **What are slots?** On the OnlyKey DUO you have 3 touch buttons, button #1 has a 1 and is located next to the green light. Button #2 has a 2 and is located on the other side. Button #3 is activated by pressing both buttons 1 & 2 at the same time. Slots correspond to the buttons on OnlyKey, for example pressing button #1 will type login information from slot ''1a'' and holding button #1 for 1 second with type login information from slot ''1b''. **What are profiles?** In the app you will notice four colors -- green, blue, yellow, purple. These colors corrispond to OnlyKey DUOs four profiles. You can hold button #3 down on OnlyKey DUO for 5+ seconds to switch between profiles. The light on OnlyKey will change to green, blue, yellow, purple to indicate which profile is active. Four profiles allows using OnlyKey DUO to store more than just 6 slots (1a, 1b, 2a, 2b, 3a, 3b), there are a total of 24 available slots. :::tip "๐Ÿ’ก Pro Tip" OnlyKey DUO has features that can be activated by pressing/holding buttons, find the full list of [button features here](/features#button-definitions) ::: **What is stored in slots?** In each slot you can set a label, static information like a password, or two-factor authentication. The label is something to help you remember what login information is stored in a slot, slots that have not been configured have no label so they are shown as ''empty''. ***Next, let's set a label to slot 1a.**** #### Set a Label {#set-a-label} ::: steps 1. Click the 1a button in the OnlyKey app and see the Slot 1a Configuration 2. Enter a label such as Gmail in the Label field, check the box next to Label, and click Submit. ![](/assets/image36-duo.png) ::: *Now the label you entered is assigned to slot 1a in the default green profile. Slot labels are helpful if you forget which button is assigned to which account you can open the OnlyKey app at any time to see how it is set up.* ![](/assets/image66-duo.png) #### OnlyKey On-The-Go {#otg} **What if I am using a computer without the OnlyKey app?** Open a text editor and then hold down the 2 button on OnlyKey for 5+ seconds. OnlyKey will type out the slot labels you have set which may look something like this: GREEN
1a Google
2a Bank
3a Email
1b O365
2b VPN
3b Github
BLUE
1a School
2a Amazon
3a Dropbox
1b
2b
3b
YELLOW
1a Kracken
2a Bittrex
3a Coinbase
1b
2b
3b
PURPLE
1a Protonmail
2a Lastpass
3a
1b
2b
3b
Since OnlyKey types out this information this method works on all computers and even mobile devices. Another low tech option is to write your labels on a card/paper and carry this in your wallet. :::warning "โš ๏ธ Warning" Obviously, no sensitive information should be written on card/paper or saved to your slot labels. Just something that helps you remember which account is assigned to which button. ::: Find out more about [TOTP support on-the-go](#google-authenticator-otg) and [using OnlyKey with mobile devices (Android and iOS)](/mobile) **Next, let's assign a password to slot 1a.** #### Set up a Slot (Basic Login) {#set-up-a-slot} The example configuration shown below would be to set OnlyKey to store our Google account password. ::: steps 1. Click the 1a button in the OnlyKey app, click the checkboxes and enter values as shown: ![](/assets/image89-duo.png) 2. Click submit to save the configuration to OnlyKey: **Now the configuration is saved and shows up in the OnlyKey app as ''Google 1''** ![](/assets/image91-duo.png) 3. Now to log in we browse to Google login page, if prompted we type our Gmail address and select Next. When presented with the password field we press button #1 on OnlyKey to output the password into the password field. ![](/assets/image90.png) ::: OnlyKey types your passwords for you so it will work on any device, even on mobile devices. ![](/assets/mobile.gif) If you would like to learn more about setting usernames, passwords, and filling custom login forms check out [Set up a Slot (Advanced Login)](#set-up-a-slot-advanced) **Next, let's use two different methods to generate strong uncrackable passwords.** #### Generate Strong Passwords Online {#generate-strong-passwords-online} There are many websites that allow you to generate a secure random password and there are also tools built into many software password managers. - Password manager built into [KeePassXC](#keepassxc) - Bitwarden password generation tool available [here](https://bitwarden.com/password-generator/) - 1password password generation tool available [here](https://1password.com/password-generator/) - LastPass password generation tool available [here](https://lastpass.com/generatepassword.php) ![](/assets/image59.png) #### Generate Strong Password via Browser Extension {#generate-strong-password-via-browser-extension} Install a browser extension by selecting add to Chrome the same way that you installed the OnlyKey app. Chrome Extension available from the Chrome Web Store [here](https://chrome.google.com/webstore/detail/strong-password-generator/emehklffcaphknhhfhadkjhpfapcbpco). ![](/assets/image21.png) **Next, let's assign a OATH-TOTP secret for MFA** ### Configure Two Factor Authentication (2FA) {#two-factor-authentication-2fa} Two-factor authentication (2FA) is essentially an extra step that is required during the login process that makes it so that even if your username and password are compromised an attacker cannot login to your account. It is called two-factor authentication, or sometimes also multifactor authentication, because more than one factor is required to login. Factors can be something you know like a password, something you are like a fingerprint or iris scan, or something you have like the OnlyKey. There are four different types of 2FA supported by OnlyKey. By supporting multiple modes of 2FA OnlyKey will work with most sites that support 2FA - [http://www.dongleauth.com/](http://www.dongleauth.com/) 1) [FIDO2 and FIDO Universal 2nd Factor Authentication (U2F)](#universal-2nd-factor-u2f)
2) [OATH TOTP](#google-authenticator-totp)
3) [Yubicoยฎ One-Time Password](#Yubico-one-time-password)
4) [Challenge-Response](#challenge-response) #### OATH TOTP (Google Authenticator) {#google-authenticator-totp} *DISCLAIMER - Googleยฎ is the registered trademarks of Google Inc. OnlyKey is not associated with or sponsored by Googleยฎ Inc.* :::tip "๐Ÿ’ก Pro Tip" If you are not a 2FA guru then this is the recommended method to use. Six digit codes will be typed automatically by OnlyKey. ::: ***Background Information*** *The way you would typically set this up without OnlyKey is to download an authenticator app to your smartphone. You would then enable TOTP MFA on a website and the website would provide you with a QR code that looks like this:* ![](/assets/image84.png) *You would then take a picture of the QR code the website gives you in your authenticator app. The app then starts generating a 6 digit number that changes every 30 seconds that is required to be typed into the website login prompt in addition to your username and password.* *This method of two-factor authentication has some notable advantages over using features like 2nd-step verification where a website will send you an SMS message with a code to enter to login. Now that the background is covered we can set this up on your OnlyKey. No phone or app required for setting this up on your OnlyKey but if you wish to maintain a backup of your two-factor authentication codes it may be a good idea to download the app and scan the QR code as a backup in case you lose your OnlyKey.* :::callout **Step 1. Enable MFA (TOTP) on Website -** If you are unsure if the website you want to setup supports TOTP check [here](https://www.dongleauth.com/). For example to do this for your Google Account you must first enable 2-Step Verification and then you select ''SETUP'' as shown below: ::: ![](/assets/image85.png) As you go through the steps you will be prompted to scan a QR code (Looks like a square bar code). You can go ahead and scan the QR code using your smartphone Authenticator app if you wish to create a backup and then select "CAN'T SCAN IT" as shown below: ![](/assets/image6.png) :::callout **Step 2. Copy and Paste Code into app -** Selecting ''CAN'T SCAN IT'' will display the private code. Select this text and copy it as shown below: ::: ![](/assets/image38.png) Now open the OnlyKey App and unlock your OnlyKey. Select the Slot to configure and paste this code into the field located next to ''OATH-TOTP (Google Authenticator)'' as shown below: ![](/assets/image65.png) Once you click submit your OnlyKey is ready to generate OTPs. :::callout **Step 3. Generate OTP -** Place your cursor in the ''Enter code'' field and press the button that corresponds to the slot that was set. In the example above we set slot 2a so we press the #2 button to generate the OTP. ::: ![](/assets/image20.png) ![](/assets/image75.png) :::warning "โš ๏ธ Warning" OnlyKey is a device without a battery, it requires the OnlyKey App to be running in order to generate TOTPs. Without the app running it will generate a code of NOTSET. Alternatively, you can browse to [https://apps.crp.to](https://apps.crp.to) if the app is not available. ::: If you are looking for step-by-step guides on setting up other popular sites with 2FA check out the guides [here](https://authy.com/guides-filter/compatible-with-authy/). Just as with the steps mentioned above, instead of scanning the QR code with an app, click "CAN'T SCAN IT" to copy and paste the text into the OATH-TOTP (Google Authenticator) field of the OnlyKey app. To find out if a specific website is supported there is a full list of websites and wether or not they support 2FA [here](https://www.dongleauth.com/). To see if a certain site is supported see that there is a check next to "One Time Passwords (OTP)" #### TOTP (Google Authenticator) On-The-Go {#google-authenticator-otg} One requirement of TOTP (Time-based One-time Password) is having the correct time. If OnlyKey is used on a system where the OnlyKey app is not running it will type out "NOTSET" instead of the OTP code. Because OnlyKey has no battery it requires an app to send it the correct time to be able to generate TOTP codes. For this reason it is important to ensure the OnlyKey app is permitted to autostart. However, OnlyKey TOTP will work on-the-go without the app running. All you have to do is browse to our web app [https://apps.crp.to](https://apps.crp.to) in Google Chrome or Firefox. This web app in addition to being used to send encrypted messages sets the current time on OnlyKey and login with TOTP will function as normal. ![](/assets/totp.png) #### Yubicoยฎ One-Time Password {#Yubico-one-time-password} *DISCLAIMER - Yubicoยฎ and Yubikeyยฎ are the registered trademarks of Yubicoยฎ AB. OnlyKey is not associated with or sponsored by Yubicoยฎ AB. Yubikeyยฎ OTP has been released by Yubicoยฎ as open source software with license found [here](https://github.com/Yubico/Yubico-c/blob/master/COPYING)* :::tip "๐Ÿ’ก Pro Tip" The majority of Yubikeyยฎ OTP applications online require Yubicloud setup. See the Yubicloud setup section after setting up Yubicoยฎ OTP. ::: * First download and install the [Yubikeyยฎ personalization tools](https://www.Yubico.com/support/download/) * Go into Yubicoยฎ OTP and select ''Quick'' ![](/assets/image43.png) * Select the ''Hide values'' checkbox and select ''Regenerate'' to create a Public Identify, Private Identity, and Secret Key. ![](/assets/image1.png) * Copy and paste these into the corresponding fields in the OnlyKey App Full Configuration (Advanced) tab. ![](/assets/image62.png) * Select ''Set Slot'' to write these values to your OnlyKey * Now your OnlyKey is ready to function in Yubikeyยฎ OTP mode * The Yubikeyยฎ OTP will be generated when the corresponding button is pressed. :::warning "โš ๏ธ Warning" Keep in mind that Yubicoยฎ OTP is a counter based authenticator so you can have only one authenticator set with the same values. If you provision multiple OnlyKeys or Yubikeys with the same values only one device will work. The majority of Yubikeyยฎ OTP applications online require Yubicloud setup. See the Yubicloud setup section after setting up Yubicoยฎ OTP. ::: #### Yubicloud (Not Officially Supported) {#yubicloud-not-officially-support} Some online services use Yubicloud for authentication. Yubicloud is owned by Yubicoยฎ and 3rd party devices are not supported so OnlyKey is not supported on Yubicloud. However, 3rd party devices will technically work with Yubicloud as long as you own an actual Yubikeyยฎ. The following instructions show you how to set up a 3rd party device on Yubicloud. This is for your information only and we do not recommend setting up a 3rd party device on Yubicloud. If you choose to follow this information to set up a 3rd party device on Yubicloud you choose to do so against our recommendations and at your own risk. ::: steps 1. Download and install the [Yubikeyยฎ personalization tools](https://www.Yubico.com/support/download/) 2. Go into Yubicoยฎ OTP and select ''Quick'' 3. Insert Yubikeyยฎ, select a configuration slot, and click ''Write configuration'' button ![](/assets/image5.png) 4. Set the values shown in the Public Identity, Private Identity, and Secret Key to your OnlyKey. 5. Once this is complete select ''Upload to Yubicoยฎ'' 6. This will open a web browser, to complete the registration enter the OTP in the ''OTP from the Yubikeyยฎ'' field by pressing the button on your OnlyKey. ![](/assets/image46.png) 7. Once the form is complete enter the Captcha and select Upload AES key. 8. Now you can test your OTP generated by OnlyKey on the site [https://demo.yubico.com/otp/verify](https://demo.yubico.com/otp/verify) ![](/assets/image51.png) ::: :::tip "๐Ÿ’ก Pro Tip" Keep in mind that once you write this configuration to OnlyKey you can no longer use a Yubikey with the same configuration. Attempting to do this causes one of the devices to be out of sync. ::: #### Security Key - FIDO2, FIDO U2F, and WebAuthn {#universal-2nd-factor-u2f} No setup is required to use OnlyKey as a security key. When registering and authenticating OnlyKey as a security key you will see OnlyKey flash blue. To use OnlyKey as a security key follow the instructions given by the website where you wish to register OnlyKey. When using Onlykey as a security key you will see the light flash blue, press any button on the OnlyKey to register or login to a site. While your device is flashing blue typing is disabled in case you also have a slot set up for basic login. ![](/assets/fido2.gif) The terminology for security keys can be a bit confusing so here are some quick definitions to make sense of it. When websites use the term security key they typically are referring to one of these: - Universal 2nd Factor (FIDO U2F) - Security key is used just as a 2nd factor along with your password. This is what most websites use. - FIDO2 - A replacement for FIDO U2F released in 2019, security key may be used as a 2nd factor along with your password or may be used as a passwordless security key on supported applications. Passwordless authentication allows logging in with just a security key and a PIN code. The term WebAuthn is sometimes used instead of FIDO2, essentially WebAuthn is the web browser standard and is part of the larger FIDO2 project. #### Security Key Advanced {#security-key-advanced} As mentioned above, FIDO U2F works as a 2nd factor and is supported for an unlimited number of sites. FIDO2 has some additional options such as resident credentials and extensions that are not yet supported by most sites or applications. **FIDO2 Resident Credentials** With resident credentials you can create a smoother, username-less login experience by saving some of the user data on the security key. To try it out we recommend using [https://www.passwordless.dev/usernameless](https://www.passwordless.dev/usernameless). As shown on the site not all browsers support this feature: ![](/assets/passwordless.png) One drawback of resident credentials is that physical devices have limited storage. OnlyKey stores up to 12 resident credentials. In the event this fills up resident credentials can be managed and removed with the [OnlyKey CLI](/command-line#list-and-remove-fido2-resident-key) ![](/assets/cli-cred-ls.png) **FIDO2 Extensions** FIDO2 allows support of extensions such as the HMAC SHA1 extension for challenge-response which is supported by OnlyKey. #### Challenge-Response {#challenge-response} Challenge response is a form of authentication where an application sends a unique challenge and OnlyKey sends back an HMACSHA1 response. This response may be used for things like encryption of data which is used by software such as [KeePassXC](#keepassxc). OnlyKey flashes yellow when a challenge is received and user presses any button on OnlyKey to authorize the response. OnlyKey supports customizable "HMAC User Input Mode" which allows the user to select if button press is required for challenge-response. ![](/assets/prefs.png) By default, no setup is required for challenge-response as OnlyKey has random HMAC key set by default and two available HMAC slots. **Advanced** Challenge-response is compatible with Yubikey devices. This permits OnlyKey and Yubikey to be used interchangeably for challenge-response with supported applications. In order to use OnlyKey and Yubikey interchangeably both must have the same HMAC key set. To set HMAC key on YubiKey we recommend using the [Yubikey Personalization Tool](https://www.yubico.com/products/services-software/download/yubikey-personalization-tools/). For example, a random secret key may be generated and loaded into slots 1 and 2 on Yubikey: ![](/assets/ykchal1.png) ![](/assets/ykchal2.png) The same secret key may be loaded into HMAC slots 1 and 2 using the OnlyKey App. Make sure to pad the end with 0s like this: ![](/assets/hmacload.png) You will see a success message in the app "Last message received: Successfully set" indicating it loaded successfully This may also be loaded into slots 1 (130 in CLI) and 2 (129 in CLI) using the [OnlyKey CLI](/command-line). ![](/assets/okchal2-cli.png) Setting the same HMAC key (40 characters, 20 bytes hex) allows OnlyKey/Yubikey devices to generate the same responses and be used interchangeably. ### Using OnlyKey With A Software Password Manager {#using-onlykey-with-a-software-password-manager} OnlyKey stores up to 24 unique accounts in offline storage and can be used to secure an unlimited number of accounts if used in conjunction with a software password manager. For example, set one of the OnlyKey slots to KeePassXC, Dashlane, Google (Smart Lock), Lastpass, etc. enable 2-factor on this slot and then use your OnlyKey to unlock your software password manager. This way you can keep your most valuable accounts in offline secure hardware and everything else in the software password manager. There are two types of software password managers: - Online Password Managers - Less secure but more convenient because passwords sync automatically between devices - [LastPass](https://onlykey.io/pages/secure-lastpass-with-onlykey) - [Dashlane](https://onlykey.io/pages/secure-dashlane-with-onlykey) - Bitwarden - 1Password - Offline Password Managers - More secure but less convenient because passwords don't sync automatically - [KeePassXC](https://onlykey.io/pages/securing-keepassxc-with-onlykey) - KeePass - Password Safe #### KeePassXC {#keepassxc} What's great about KeePassXC: - Its 100% open source (verifiable security) - Its cross platform, supports Windows, Linux, Mac (in contrast to KeePass which is for Windows) - Its offline, no passwords in the cloud - We collaborated with the KeePassXC team to develop a custom integration with OnlyKey that provides a major security benefit ![](/assets/keepassxc.png) Starting with the 2.5.0 release of KeePassXC you can use OnlyKey in challenge-response mode to secure your KeePassXC password database. **Windows Install** - Download and install KeePassXC from [https://keepassxc.org/download/#windows](https://keepassxc.org/download/#windows) **macOS Install** - Download and install KeePassXC from [https://keepassxc.org/download/#mac](https://keepassxc.org/download/#mac) - An additional step is required in macOS 10.15 Catalina - Go to Settings -> Security & Privacy -> Input Monitoring - Unlock and click the + - Select KeePassXC and click open *This additional step is required so that KeePassXC has permission to access your OnlyKey* **Linux Install** - Download and install KeePassXC from [https://keepassxc.org/download/#linux](https://keepassxc.org/download/#linux) **KeePassXC Setup** You can either import passwords to a create a new KeePassXC database by going to Database -> Import, or create a new empty KeePassXC database by selecting "Create a new KeePassXC database" :::tip "๐Ÿ’ก Pro Tip" Not sure how to export the passwords from your old password manager?
- Chrome/Brave - Go to Settings -> Passwords -> click ... and select Export passwords
::: - Give your Password database a name and continue - Select continue again to keep default encryption settings - Enter a master password for your password database, click the dice to randomly generate one - (Optional) Copy the master password and save it to one of your OnlyKey slots using the OnlyKey app - Select "Add additional protection" - Select "Add YubiKey Challenge-Response" ![](/assets/keepassxc4.png) - OnlyKey will show in the list of devices, select slot1 or slot2 and click done - OnlyKey will flash yellow, press any button, if importing OnlyKey may flash yellow several times, press any button when it does this to complete import - Congrats! You now have a new password database :::warning "โš ๏ธ Warning" **Remember to securely delete your exported password file after you have imported it into KeePassXC** ::: **KeePassXC Settings/Sync** - Click on the wrench icon in KeePassXC to customize settings - To enable browser integration (where KeePassXC can autofill account information in browser) click the Browser Integration icon, check the Enable browser integration checkbox, and select the browsers to enable - Install the KeePassXC Browser plugin [https://keepassxc.org/docs/keepassxc-browser-migration/](https://keepassxc.org/docs/keepassxc-browser-migration/) - To enable the SSH Agent click the SSH Agent icon and check the Enable SSH Agent checkbox. With this feature enabled your OnlyKey will be required to SSH. **KeePassXC Cloud Sync** While your KeePassXC database is encrypted and can be synced to multiple devices by copying it to cloud drive a better option that we recommend is to use [Cryptomator](https://cryptomator.org/). - Download and install Cryptomator - Create a vault inside of your cloud drive synced folder (i.e. Onedrive, Google Drive, etc) - You can optionally store the vault password in one of your OnlyKey slots - Move your KeePassXC kbdx file to your Cryptomator vault - Congrats! You now can access your new password database from any computer with Internet access, Cryptomator, and your OnlyKey. :::tip "๐Ÿ’ก Pro Tip" So now your passwords are very secure, but you need to make sure they aren't so secure that you lock yourself out. Create a backup of both your KeePassXC database and your [OnlyKey](#secure-encrypted-backup-anywhere) and keep it somewhere safe, like in an actual safe. If you don't keep your Cryptomator password and KeePassXC password on your OnlyKey make sure you have a backup of those as well. Be sure to keep your OnlyKey backup passphrase in a safe location too in case you forget. ::: **What is needed to use the challenge-response feature?** No setup is required, OnlyKey generates a private key for HMACSHA1 automatically when the device is first configured. After creating the KeePassXC database you will be prompted to press any button on OnlyKey (flashes yellow) to unlock your KeePassXC database. Additionally, since OnlyKey also stores static passwords you can use OnlyKey to store your KeePassXC master password in one of the available slots. **What is challenge-response?** Your passwords are stored in an encrypted Keepass container, in addition to requiring a master password to decrypt, a response (HMAC SHA1) from OnlyKey is required. The OnlyKey flashes yellow and you must press a button on OnlyKey. By requiring a master password and an OnlyKey, your accounts are protected by two layers of security. This solution is more secure than software password managers that only rely on a master password. Here is a threat model explaining why - In order to unlock your KeePassXC database a hacker would need four things: - Access to your computer (where the KeePass database resides) - Physical access to your OnlyKey - Know your OnlyKey PIN - Know your master password #### LastPass {#lastpass} LastPass supports both Google Authenticator and Yubicoยฎ OTP. Google Authenticator is supported in the free version of LastPass and Yubicoยฎ OTP is supported in the premium version of LastPass. To protect LastPass account with Google Authenticator 2FA follow the steps below. ::: steps 1. Go into Account settings-> Multi-factor Options and select the edit button in the Google Authenticator column. ![](/assets/image71.png) 2. Change to enabled and select View button next to Private Key ![](/assets/image7.png) 3. You will be prompted to enter your master password and then the key is displayed. ![](/assets/image11.png) 4. Copy and paste the key into the Google Auth OTP field of the OnlyKey app for the slot that you want to set up. ![](/assets/image53.png) 5. Make sure to check the radio button next to Google Auth OTP and select Submit. 6. Go back to the LastPass app and select Update. You will be prompted for your password again and then your current verification code. Click inside the verification code box and press the button assigned to the slot you set up on your OnlyKey to type out the verification code. ![](/assets/image74.png) ![](/assets/image13.png) ![](/assets/image10.png) ::: #### DashLane {#dashlane} DashLane supports Google Authenticator, Yubicoยฎ OTP, and Security Keys. The security key (FIDO2 / U2F) option is the most secure option. #### Google SmartLock {#google-smartlock} SmartLock is a password manager that is available in Google Chrome, it supports Google Authenticator and Security Keys. The security key (FIDO2 / U2F) option is the most secure option. ## Preferences {#preferences} OnlyKey has several customizable preferences that can be accessed from the preferences tab of the configuration app. ![](/assets/image63.png) ### Configurable Inactivity Lockout Period {#configurable-inactivity-lockout-period} This is the amount of time that the OnlyKey should remain unlocked while not being used. The default value is 30 minutes and the maximum is 255 minutes (about 4 hours). To disable lockout altogether set the lockout to 0. ### Configurable Keyboard Type Speed {#configurable-keyboard-type-speed} Setting a custom type speed may be desirable in cases where the application you are using can not keep up with fast typing. Or if you don't use any applications with type speed restrictions you can have the text typed at top speed for the fastest logins. Setting value to 1 will result in very slow type speed of about one character a second, setting value to 10 will result in very fast type speed that will type almost instantly. ### Configurable Keyboard Layouts {#configurable-keyboard-layouts} You can change your keyboard layout on the fly through the OnlyKey app preferences. Traveling to France from the US? No problem just set the OnlyKey keyboard to French and change it back to US when you return. Here are the options supported for international keyboards: * US_ENGLISH * CANADIAN_FRENCH * CANADIAN_MULTILINGUAL * FINNISH * FRENCH * FRENCH_BELGIAN * FRENCH_SWISS * GERMAN * GERMAN_MAC * GERMAN_SWISS * ICELANDIC * IRISH * ITALIAN * NORWEGIAN * PORTUGUESE * PORTUGUESE_BRAZILIAN * SPANISH * SPANISH_LATIN_AMERICA * SWEDISH * TURKISH * UNITED_KINGDOM * US_INTERNATIONAL * CZECH * SERBIAN_LATIN_ONLY Note: These additional keyboard layouts are available but cannot currently be set using the OnlyKey app. To set these keyboard layouts use the [OnlyKey CLI here](/command-line#keylayout). * DANISH MAC * HUNGARIAN * US_DVORAK ### Derived Key User Input Mode {#derived-challenge-mode} OnlyKey supports automatic generation of keys that may be used for SSH and PGP/GPG with the [OnlyKey Agent](/onlykey-agent). The default setting is "Challenge Code Required" which requires a 3 digit challenge code to be entered on OnlyKey to perform SSH or PGP/GPG operation. This is great for security but for some users a more convenient approach may be preferred. With "Button Press Required", a physical press on any key is all that is required to perform the operation. ### Stored Key User Input Mode {#stored-challenge-mode} OnlyKey supports [import of existing OpenPGP keys](/importpgp#loading-keys) using the [OnlyKey app](/app). These keys once imported are securely stored in OnlyKey hardware and may be used to perform SSH or PGP/GPG operations with the [OnlyKey Agent](/onlykey-agent) or in the browser with the [OnlyKey WebCrypt](/webcrypt). By default, you must enter a 3 digit challenge code on OnlyKey to perform SSH or PGP/GPG operation. If a more convenient approach is preferred "Button Press Required" may be set so that a physical press on any key is all that is required. ### HMAC Mode {#hmac-mode} OnlyKey supports HMAC challenge-response. By default, user input (button press) is required on OnlyKey to perform HMAC operation. For some use cases such as full-disk encryption no button press may be preferred. With "Button Press Not Required", HMAC challenge-response operations may be performed without user interaction. ### Backup Key Mode {#backup-key-mode} You can change your backup key/passphrase at any time by entering your PIN to put the device in config mode. By setting backup key mode to locked, the backup key/passphrase may not be changed. This setting provides extra security so that even if an adversary has your PIN and has physical access to your device they would not be able to backup and restore your data. :::warning "โš ๏ธ Warning" With OnlyKey DUO, if no PIN is set the backup key is locked by default. ::: ### Configurable Wipe Mode {#configurable-wipe-mode} Setting wipe mode to "Full Wipe" ensures that not only is your sensitive data wiped when a factory default occurs but also the firmware is wiped. This ensures that no data or meta data such as what version of firmware you had would be accessible to an adversary that steals or otherwise obtains a user's OnlyKey and then performs a factory default. The tradeoff of setting wipe mode to full wipe is that this cannot be changed once set and when a factory default occurs the firmware must be reloaded using the [firmware upgrade guide](/duousersguide#loading-onlykey-firmware). For user's desiring the highest level of security we recommend enabling full wipe. ### Sysadmin Mode {#sysadmin-mode} By default, OnlyKey may only type regular keyboard characters, TAB, and RETURN. This is useful for entering usernames, passwords, etc. For more advanced use cases such as for system administrators it may be helpful to utilize modifier keys to save time while entering common keystrokes such as CTRL-ALT-DEL, and then entering a username/password. With "Sysadmin Mode" set this permits the use of the following modifier and additional keys to be stored and typed by OnlyKey: - Ctrl (\c) - Shift (\s) - Alt (\a) - Windows (PC) or Clover (Mac) (\g) - Tab (\t) - Return (\r) - Printscreen (\p) - Home (\h) - Page Up (\u) - Page Down (\o) - End (\e) - Delete (\d) - Backspace (\b) - Arrow-Up (\U) - Arrow-Down (\D) - Arrow-Left (\L) - Arrow-Right (\R) - Escape (\E) - Delay (\#) # is number of seconds to wait :::warning "โš ๏ธ Warning" Once you enable this feature you will no longer be able to set slot values without first putting OnlyKey into config mode. This adds an extra layer of security for system administrators. ::: Once enabled, this can be used like this: i.e. To press Ctrl-Alt-Del, release Ctrl-Alt-Del, delay 3 seconds, press TAB, enter username, and enter password: ``` \c\a\d \3 USERNAME \t PASSWORD ``` Notice that a {space} followed by the \ character is used to begin \c\a\d and one space is used to end (resets modifier keys). To use one space to start and one to end for multiple actions there will be two spaces in between actions like: ``` {space} {\} {c} {\} {a} {\} {d} {space} {space} {\} {3} {space} {USERNAME} {space} {\} {t} {USERNAME} ``` Here are some other common examples: - To open terminal in Linux, then delay two seconds, then enter a command into terminal (2 second delays added) ``` \g \2 terminal \r \2 ssh user@domain \r ``` - To press Windows key and open run box, then delay, then enter a powershell command (2 second delays added) ``` \g \2 run \2 \r \2 powershell.exe ls \r ``` - To press Windows key and run cmd command to open calculator (2 second delays added) ``` \g \2 cmd \r calc \2 \r ``` - To enter text into fields 1, 3, and 5 of a multiple field form and then submit ``` \t textfield1 \t \t textfield3 \t \t textfield5 \r ``` ### Configurable Lock Button {#configurable-lock-button} One of the buttons on OnlyKey can be configured as a lock button. When the lock button is pressed the OnlyKey locks and the OnlyKey sends keystrokes to lock the computer (Windows+L for Windows and Linux, CTRL+SHIFT+EJECT for Mac). ### Configurable Indicator Light (LED) Brightness {#configurable-led-brightness} The multicolor LED on OnlyKey is set to medium (8) brightness by default. Brightness may be adjusted between 1 (dimmest) and 10 (brightest). ### Change your PIN {#pin-change} To change PIN go to the [Setup] tab, put OnlyKey in config mode, and follow the instruction in the app to set a new PIN. ## Encryption Keys {#encryption-keys} OnlyKey makes encryption keys easier and more secure by storing them offline, protected even if the computer using the encryption key is compromised. ### Key FAQ {#key-faq} **What is a key?** In the simplest terms an encryption key is something you have that allows you to encrypt or sign data. This data could be emails, files, or anything really. Every time you browse to a secure website there are keys being used in the background to encrypt the information you send so that only you and the website can see the information. **Why does protecting private keys matter?** You may hear the term private key being used sometimes, we will not get into the details here but there are plenty of places to read further on this topic online. For our purposes here a private key is used to read the secure messages / data that someone sends you. Only you should have access to this key because anyone with access to the key can read all messages sent to you in the past or in the future. This is why it is important to protect the key from exposure and why storing it securely on the OnlyKey is better than on your computer somewhere. **What does OnlyKey use keys for?** The OnlyKey stores private keys. These private keys are used for three different purposes. 1. **Signing and Encrypted Messages/Files (OpenPGP)** - **[OnlyKey WebCrypt](/webcrypt)** - Provides a way to securely use OnlyKey for OpenPGP in the browser. The Webcrypt app loads everything necessary to encrypt messages and files directly in the local browser without the need to send messages or files over the Internet. Data between [OnlyKey](https://onlykey.io) and the local browser is end-to-end encrypted. This provides encryption everywhere on-the-go and supports macOS, Windows, Linux, Chrome OS, Android, and iPhone (Safari on iOS 13.3+). More information on mobile support [here](/mobile). :::tip "๐Ÿ’ก Pro Tip" Watch a video [here](https://vimeo.com/374653109) that demonstrates using OnlyKey WebCrypt for file encryption ::: embed https://vimeo.com/374653109 ::: - **[OnlyKey GPG Agent](/onlykey-agent#gpg-agent-quickstart-guide)** - Provides a way to securely use OnlyKey for OpenPGP on a local computer. Instead of keeping keys on a computer, OnlyKey generates and securely stores your keys off of the computer and you can still easily use GPG to do things like sign emails, git commits, software packages etc. ![](/assets/agent.gif) 2. **SSH Authentication** - SSH is a popular remote access tool that is often used by administrators. Thanks to the OnlyKey SSH Agent remote access can be passwordless and more secure. For information on using OnlyKey for SSH authentication see [OnlyKey SSH Agent](/onlykey-agent#ssh-agent-quickstart-guide). 3. **Secure Encrypted Backup** - This will backup everything including your stored accounts, preferences, and other keys to an encrypted text file. For information on backing up OnlyKey see [Secure Encrypted Backup](#secure-encrypted-backup-anywhere). **How do I get started?** By default, no setup is required to use [OnlyKey GPG Agent](/onlykey-agent#gpg-agent-quickstart-guide) and [OnlyKey SSH Agent](/onlykey-agent#ssh-agent-quickstart-guide) as OnlyKey uses random key (derived keys) by default. To use OnlyKey WebCrypt or OnlyKey Agent with your own OpenPGP keys ([stored keys](/onlykey-agent#stored-keys)) follow the guide [here](/importpgp) to generate and load OpenPGP keys onto OnlyKey. ## Secure Encrypted Backup Anywhere {#secure-encrypted-backup-anywhere} The Secure Encrypted Backup Anywhere feature allows you to backup OnlyKey on the go. The way that this works is that the OnlyKey encrypts everything on your OnlyKey using an encryption key and then types it out. This allows saving the backup in a text file or email on any computer. ### Backup With OnlyKey App {#backup-with-onlykey-app} :::tip "๐Ÿ’ก Pro Tip" Prefer a how-to video? Watch one [here](https://vimeo.com/967904007) that demonstrates backing up OnlyKey using the OnlyKey App ::: embed https://vimeo.com/967904007 ::: ::: steps 1. First, you must have a backup passphrase or key set on your OnlyKey. 2. Click on the Backup/Restore tab of the OnlyKey app. 3. Click inside the Backup data box and then hold down the 1 button on your OnlyKey for 5 seconds or more and then release. This will type out an encrypted backup of your OnlyKey configuration into the box. Select save file to save the backup file which has a timestamp so you can keep track of the latest backup file. ![](/assets/image78.png) ::: :::tip "๐Ÿ’ก Pro Tip" Backup can take a long time if your Keyboard Type Speed is set to a low setting. To speed this up go to Preferences in the OnlyKey app and select a higher setting, 9 usually works well ::: ### Backup Without OnlyKey App {#backup-without-onlykey-app} The process is the same to backup without the app. OnlyKey can type out your encrypted backup anywhere. **Save to a text file** - Instead of clicking in the Backup data box you could click into any text editor like notepad and when the backup is complete save the text file using whatever filename you prefer. **Save it in an email** - In the same way you could also click into any email client and then when the backup is complete send the email to yourself or someone else. ## Restore From Backup {#restore-from-backup} Using the backup file created in the [Secure Encrypted Backup Anywhere](/duousersguide#secure-encrypted-backup-anywhere) section, OnlyKey can be restored to a previous state. This also allows restoring to a different OnlyKey or a second OnlyKey in order to have an extra. :::note The way that a restore works is that it overwrites the current information on your OnlyKey with the information stored in the backup. So if you for example have a backup file that contains a password in slot 1 and you do a restore to an OnlyKey that already has a username and password in slot 1 the result would be that the username would remain unchanged and the password would be overwritten. ::: ::: steps 1. Ensure that the same passphrase/key is loaded onto the OnlyKey that was used to backup. 2. Put the OnlyKey into config mode by holding the 6 button down for more than 5 seconds, and then re-entering your PIN. You will see the OnlyKey LED fade in and out continuously (Red) while in config mode. 3. Click on the Backup/Restore tab of the OnlyKey App and then click Choose File to select your OnlyKey backup file. Click Restore to OnlyKey. If you used the OnlyKey App to create the backup then the name of this file will be ''onlykey-backup-.txt''. The timestamp can be used to make sure you are loading the latest backup. ![](/assets/image45.png) 4. Restore may take a minute or two depending on the amount of data to restore. You will know that the restore is complete when the OnlyKey reboots automatically. ::: ## Loading OnlyKey DUO Firmware {#loading-onlykey-firmware} :::callout **Backup OnlyKey** - It is always a good idea to create a backup prior to upgrading. Do this by going to the Backup/Restore tab in the OnlyKey app. Ensure you have a copy of your backup key/passphrase ([User Guide Backup Instructions here](/usersguide#secure-encrypted-backup-anywhere)). ::: ### Download Firmware There is a tab named Firmware in the app. This may be used to load the latest firmware onto OnlyKey directly through the OnlyKey app. ![](/assets/firmware-duo.png) - Download OnlyKey DUO firmware ### Load Signed Firmware - Go to the Firmware tab in the app - Follow the instructions in the app to load firmware :::note You can ensure the integrity of your downloaded file by verifying the checksum.
Signed_OnlyKey_3_0_4_STD.txt SHA 256 checksum:
f895100a2f828b66ec5335fd676ef659daf87d51bfeecca5fb8bf9b7c8e259bd ::: ## OnlyKey Accessories / Mobile Support {#onlykey-accessories-mobile-support} ### Extra USB-C Outer Shell {#onlykey-case} The OnlyKey DUO outer shell provides USB-C and additional protection. #### [Purchase in OnlyKey Store](https://onlykey.io/collections/all/products/extra-onlykey-duo-usb-c-shell-black?variant=41182801526970) ### Android/iOS Support {#android-support} Android and iOS is supported by using a USB on-the-go (OTG) adapter. For more information read [Using OnlyKey with Mobile Devices (Android and iOS)](/mobile) ## Set up a Slot (Advanced Login) {#set-up-a-slot-advanced} :::note OnlyKey DUO by default has no device PIN required and when no device PIN is set allows users to set static passwords or multi-factor authentication to slots. This limitation only applies when OnlyKey DUO has no device PIN, to enable full features and perform advanced logins set a device PIN in the ''Setup'' tab of the OnlyKey App. This device PIN provides physical security in the event the OnlyKey DUO is lost or stolen ::: :::tip "๐Ÿ’ก Pro Tip" PIN may be entered via OnlyKey App or by physical touch. Touch buttons 1, 2, 3 to enter 1, 2, 3 and hold (for 1 second) buttons 1, 2, 3 to enter 4, 5, 6. ::: **Once OnlyKey DUO is PIN protected multiple values can be set to a slot, let's assign a username AND password to slot 1b.** The example configuration shown below would be to set OnlyKey to store our Dropbox username and password. ::: steps 1. Click the 1b button in the OnlyKey app, click the checkboxes and enter values as shown: ![](/assets/image93.png) 2. Click submit to save the configuration to OnlyKey: **Now the configuration is saved and shows up in the OnlyKey app as ''Dropbox''** ![](/assets/image94-duo.png) 3. Now to log in we browse to Dropbox login page, click on the username field and hold button #1 (for more than one second) on OnlyKey to output the username and password into the login field. ![](/assets/image92.png) ::: :::note Since not all Login pages are the same OnlyKey has options like tab (use to go to the next field) and Return (submit). These essentially press either the tab or return key so if you are unsure of how to set up your OnlyKey configuration try logging into your login page first by using just your keyboard. For the example above you would do this by entering your username, pressing the Return/Enter key, on the next page entering your password and then pressing the Return/Enter key to complete your login.

Before testing a configuration in your web browser it is a good idea to try it out in a text editor like notepad, just to make sure it looks right. The last thing you want is to find that you accidentally are typing your password out in the wrong field and now have to change the password. ::: While the username, tab, password, return format covers many login pages there are lots of custom login pages and OnlyKey has features to match those custom login scenerios. If you need OnlyKey to fill a custom login form that does not fit into the basic login format i.e. You need to perform the following:
- Enter the Username
- Press RETURN
- Wait for website to load next page - Enter the password
- Press RETURN

Delays may be set to allow for the web page to load. ::: steps 1. Click the 2a button in the OnlyKey app, select the Full Configuration (Advanced) tab, click the checkboxes and enter values as shown: ![](/assets/image95.png) 2. Click submit to save the configuration to OnlyKey: **Now the configuration is saved and shows up in the OnlyKey app as Custom Login** ![](/assets/image96-duo.png) 3. Now to log in we browse to custom login page, click on the username field and press button #2 on OnlyKey to output the username and press RETURN. OnlyKey then waits 3 seconds for the page to load before entering password into the password field. ::: While this covers the majority of login scenerios there still may be some that don't fit the template. If you need OnlyKey to fill a custom login form that does not fit into the template i.e. You need to perform the following:
- Enter the Username
- Press TAB
- Press RETURN
- Wait for website to load next page - Enter the password
- Press TAB
- Press RETURN

You can enter ' \t' or ' \r' inline with slot data to type the extra TAB or RETURN and ' \d3' to DELAY 3 seconds.
![](/assets/image97.png) Where in the username field the value is set to:
``` onlykey \t \r \d3 ``` Where in the password field the value is set to:
``` password \t \r ```
You can chain together multiple ' \t' or ' \r' in the fields. **Its one space to start and one space to end** so if your chaining together multiple tabs it would have a double space in between like: ``` {space} {\} {t} {space} {space} {\} {t} {space} {password} {space} {\} {r} ``` To do even more like press special keys such as Ctrl-Alt-Del OnlyKey has a special mode that enables filling virtually any form or login. See [Sysadmin Mode](#sysadmin-mode) for more details. Additionally, by using the URL field in Full Configuration (Advanced) we can have the OnlyKey type the login page URL into the browser and browse to the login page. This way a one-touch login is possible. Just select the empty URL field in the browser and the URL is automatically typed out and Return is pressed to browse to the site. Once on the site loads the password is entered and the login is complete. :::tip "๐Ÿ’ก Pro Tip" Using the URL field provides protection against spear phishing attacks as this provides assurance that the site you are entering your password into is the legitimate site. For example, if you receive an email asking you to log into your account to verify something instead of clicking the link in the email to login you would use OnlyKey to browse to the correct site to login.
*Need a URL longer than 56 characters? Try using a URL shortner like Bit.ly* ::: **The example configuration shown below would be to set up a URL and password to automatically login to the Google page shown below. Notice that the username is already remembered by the website, so there is not a need to set this in the OnlyKey slot.** ![](/assets/image72.png) ![](/assets/image23.png) #### Test a Slot {#test-a-slot} Once you set your desired account information to a slot then try it out by going to the login page, clicking in the login field, and pressing the corresponding button on the OnlyKey. ***Common issues:*** * ***The password is entered before page loads.*** * *Set the delay, usually 2-3 seconds works well but this may not be enough time for slow web pages or slow internet connections.* * ***There is a Captcha required sometimes after password*** * *You can either set the delay to a high value like 9 seconds to give yourself time to enter this or select None. Selecting None means that the password is entered but not submitted so you have time to enter additional information.* * ***Everything works fine but I really wish it typed faster.*** * *You can adjust the type speed in [preferences.](#configurable-keyboard-type-speed)* **These examples illustrate how to use OnlyKey in two real world scenarios. A key takeaway here is that you can configure OnlyKey to automatically do what you would normally do manually. Any combination of the fields shown in the slot configuration may be used or not used to fit login format.**
*The table below shows how to configure some common login forms that at first may seem problematic.*
Login Format Configuration
Site that does not automatically select username field after loading page (i.e.Kracken). ![](/assets/image42.png) With URL - You will notice that "Tab before UserName" is checked. This will select the username field as it is not automatically selected when the page loads. ![](/assets/image54.png) Without URL - Browse to the login page first and place cursor in the username field before selecting the assigned OnlyKey button. ![](/assets/image4.png)
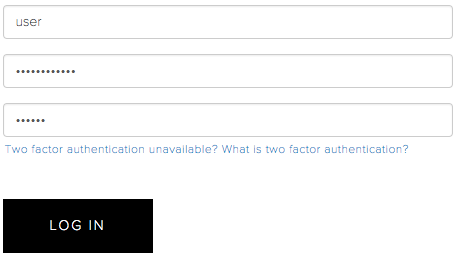
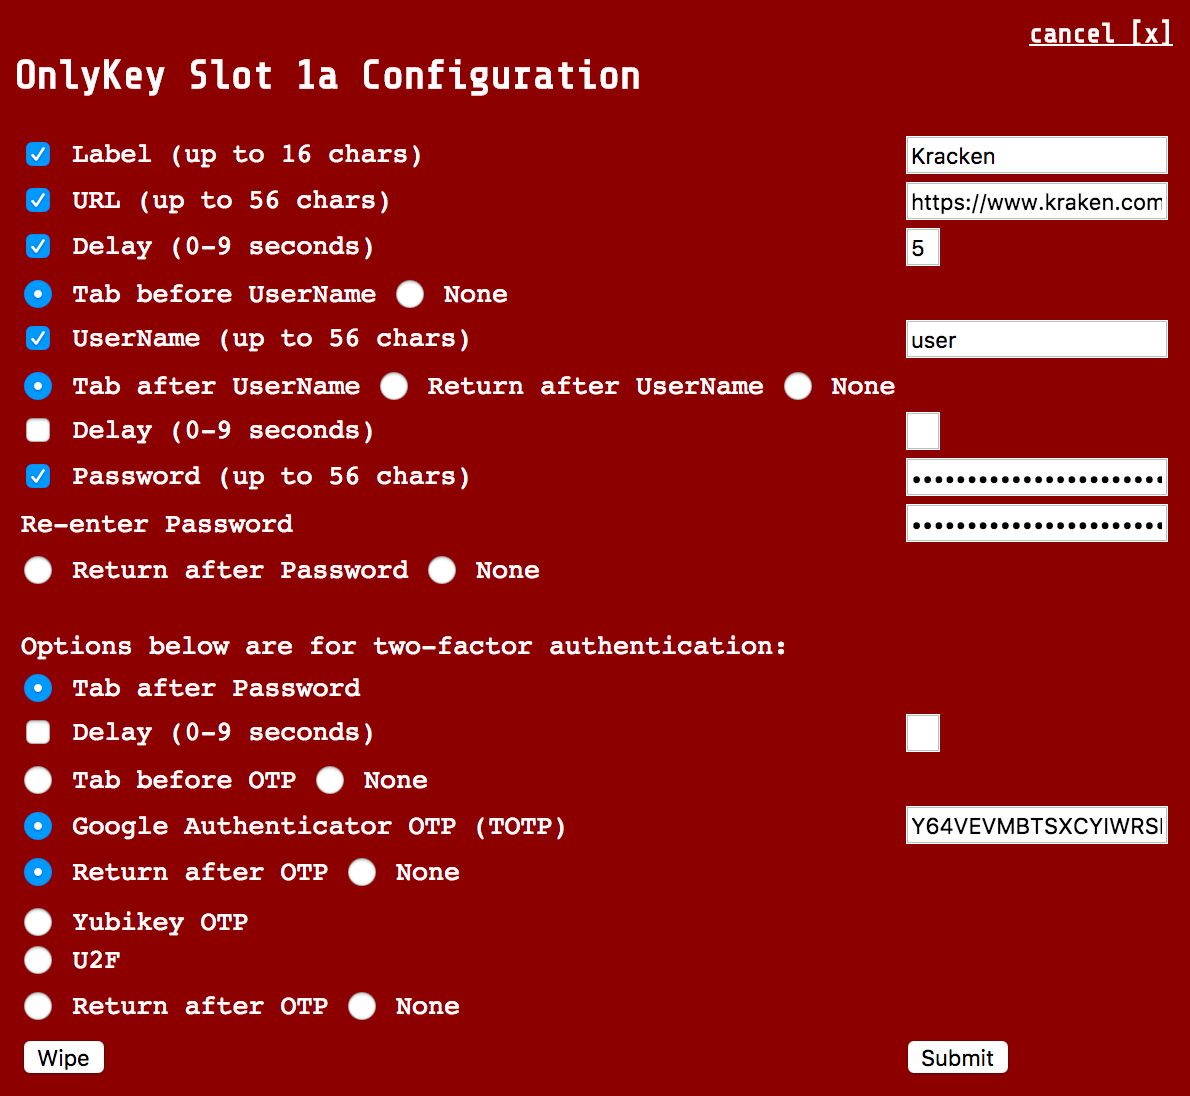
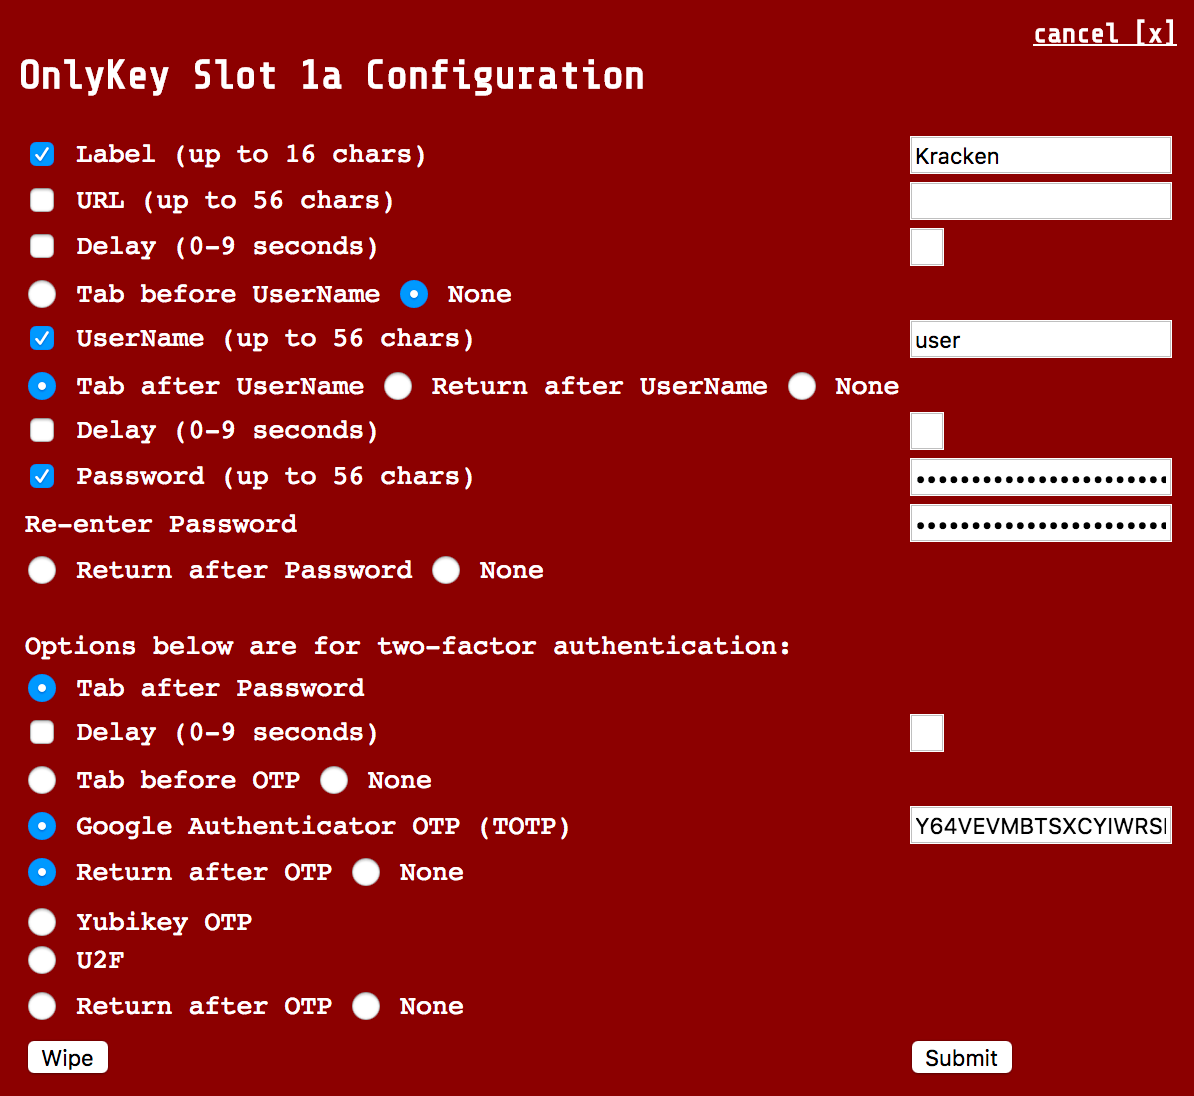
Site where username is remembered after first login (i.e. Google). Password and 2FA only - This is usually the best option if you remember your username/email address as this will work on any computer whether your username is remembered or not. This method does not include URL in case you are prompted for a password. ![](/assets/image60.png) Username Remembered w/URL - If you use your device mostly on a computer where you username is remembered this is a good option. If you use this configuration on a computer where username is not remembered then you must output of the login information into notepad and paste into login fields. ![](/assets/image61.png)
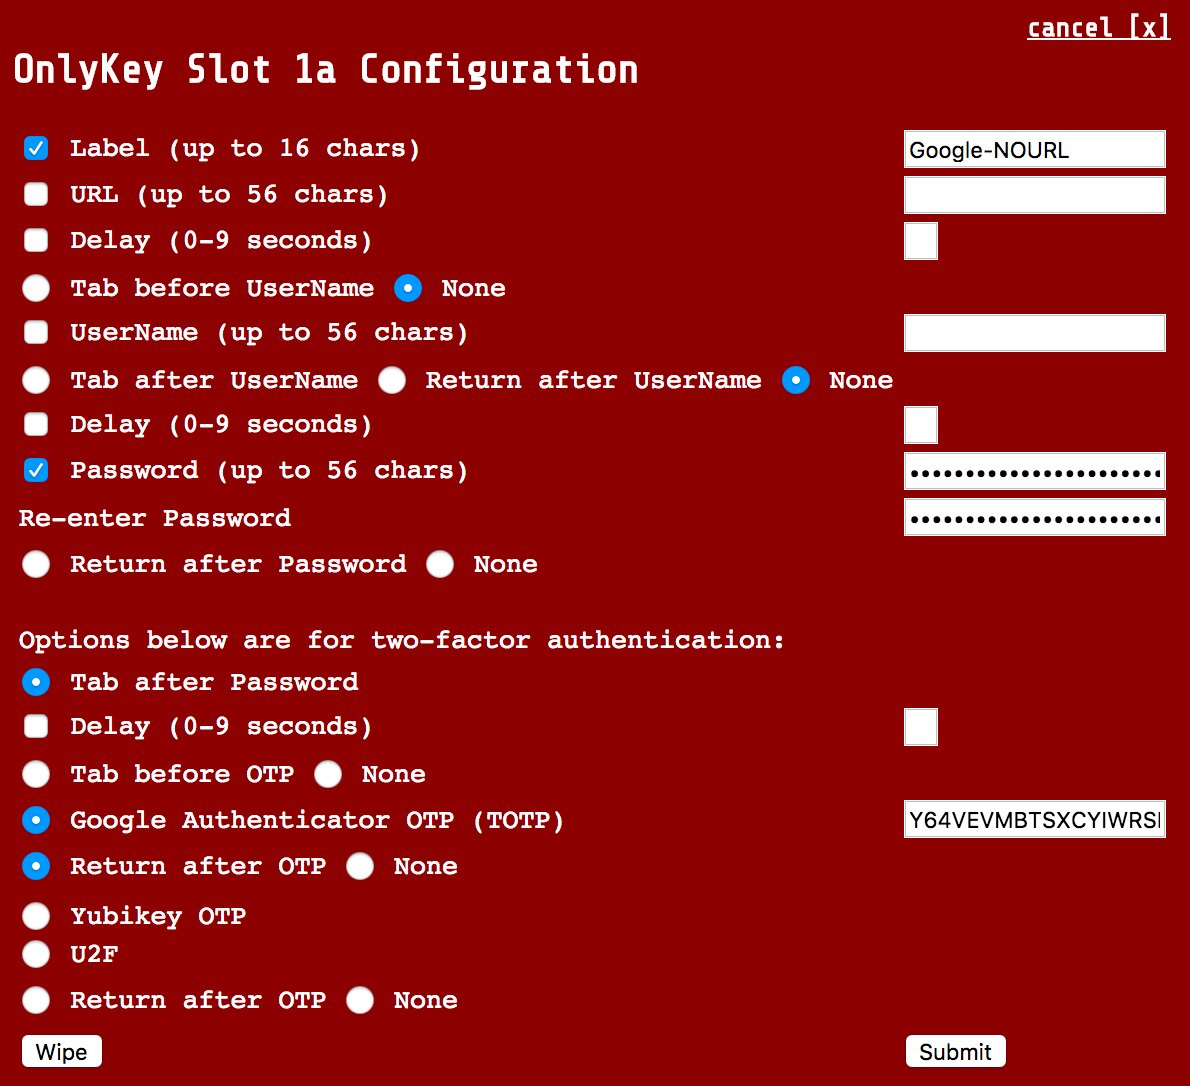
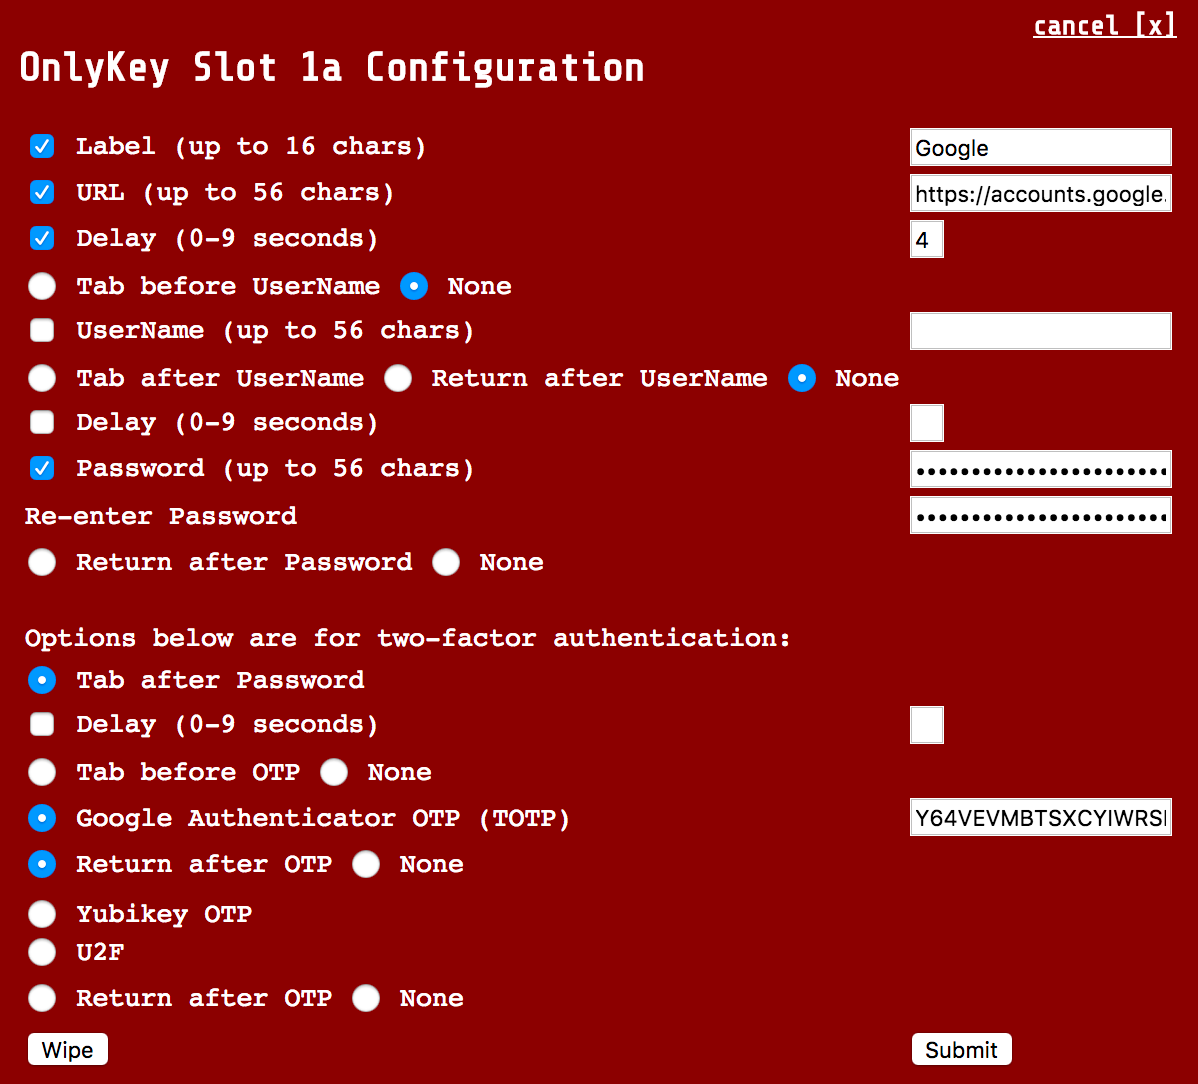
Site that does not automatically select OTP code field (i.e. Salesforce) ![](/assets/image22.png) After loading next page ![](/assets/image47.png) You will notice that "Tab before OTP" is checked. This will select the OTP field as it is not automatically selected when the page loads. ![](/assets/image44.png)
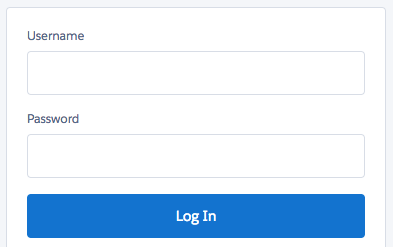
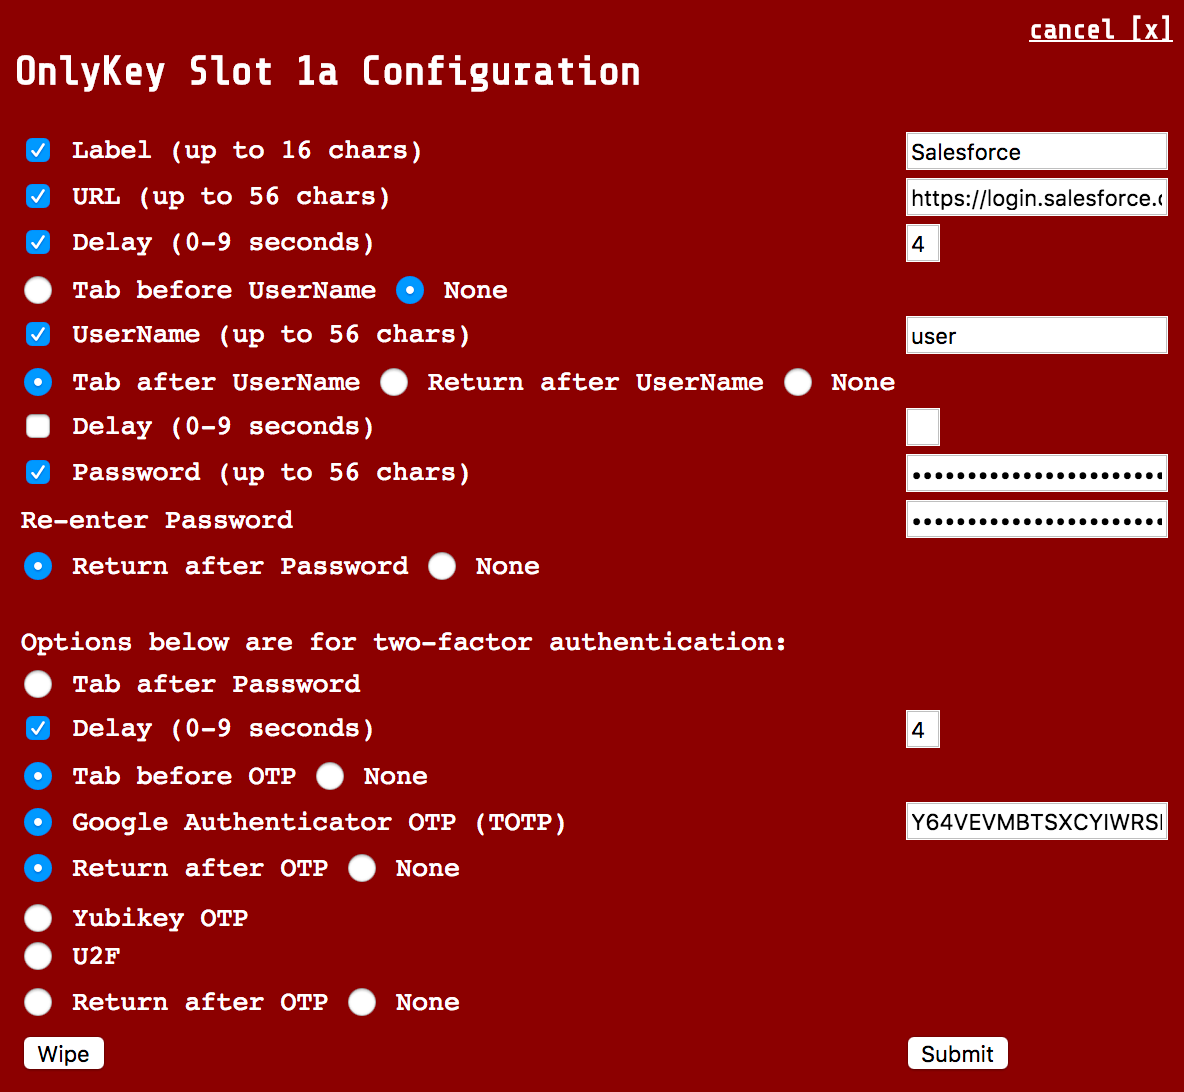
Site where username and password is required first and then OTP code field appears below (i.e. IT Glue) ![](/assets/image28.png) ![](/assets/image52.png)
## Troubleshooting {#troubleshooting} ### Common Issues {#common-issues} Below is a list of common issues and solutions.
Issue Solution
White Light on OnlyKey If full wipe mode is enabled (disabled by default) the OnlyKey will wipe both data and firmware. Follow instructions in the upgrade guide here to load firmware.
Not working with certain sites / Not entering data in correct field We often get customers that ask how to set up a specific site with OnlyKey. There are several examples listed in the table provided in the Set up a slot section. If you have a use case that is not covered by this please open a new issue on the support forum.
Missing characters while typing / typing too fast / typing too slow Adjust the type speed in preferences.
Google Authenticator types NOTSET instead of OTP code This occurs when the OnlyKey does not have the time set. Time is set from the OnlyKey app which occurs automatically. The OnlyKey app must be installed for the code to be generated.
Entering data into OnlyKey App and selecting submit but the data is not saved The check box next to the data must be selected.
Yubicoยฎ OTP Error The majority of Yubikeyยฎ OTP applications require Yubicloud setup including LastPass. See Yubicloud section of User's Guide.
If you have an issue not listed here please reference the online support forum [here.](https://forum.onlykey.io) ## Web Links {#web-links} Documentation - [https://docs.onlykey.io](https://docs.onlykey.io) FAQs - [/faq](/faq) Forum -[ https://forum.onlykey.io](https://forum.onlykey.io) Store โ€“[ https://onlykey.io/products](https://onlykey.io/products) Github โ€“[ https://github.com/trustcrypto](https://github.com/trustcrypto) Getting started with OnlyKey โ€“ [https://onlykey.io/duo](https://onlykey.io/duo) --- ## [OnlyKey FAQ](https://docs.onlykey.io/faq/) --- title: OnlyKey FAQ description: Frequently Asked Questions slug: faq last_updated: Oct, 18 2020 keywords: frequently asked questions, FAQ, question and answer --- ## How do I get started with OnlyKey? Just getting started with OnlyKey? [Start here](https://onlykey.io/start). Just getting started with OnlyKey DUO? [Start here](https://onlykey.io/duo). ## Where do I go for OnlyKey support? Check out the [OnlyKey Documentation](https://docs.onlykey.io) and if that does not answer your question reach out on the [OnlyKey Support Forum](https://forum.onlykey.io). ## Is OnlyKey Waterproof and Durable? OnlyKey is protected with a tamper-resistant and chemical-resistant compound that provides: 1. **Durability** - OnlyKey is crush and impact resistant, it stands up to abuse. You can carry it on your keychain, in your pocket, etc. 2. **Waterproof** - Accidentally leave your OnlyKey in your pocket and it goes through the washing machine? No problem. 3. **Tamper-evident / Tamper-resistant** - Attempts by an adversary to access the electronics inside of OnlyKey will create visible damage. 4. **Transparency** - The protective compound is clear so that it is possible to visually verify the electronic components (verify no hardware backdoor). ## How Does OnlyKey Keep My Information From Getting Hacked? First it is important to understand how accounts are hacked as there are several ways and OnlyKey has unique features that prevent each type. **1) The site you use is breached (i.e. Yahoo, LinkedIn, Target, Anthem, Sony etc.)** If the site you use is breached the attacker may be able to get your password in a couple of ways. a) They get a dump of all passwords in clear text. This is less likely to occur as it usually requires that the service used very bad security practices. If it does occur then it does not matter how long or complex the password is, the password has been compromised. b) They get a hashed dump of all passwords. If this occurs the attacker has to crack the passwords and only the weak passwords would be compromised. OnlyKey addresses b) by allowing users to set strong, up to 56 character long passwords which cannot be cracked by any available methods. These strong passwords are also more usable since you don't have to remember them, they are stored on your OnlyKey and typed out for you. OnlyKey addresses a) by making multi-factor authentication (MFA) compatible with the largest number of sites. If MFA is used and an attacker has your password they still can't access your account as they do not have your second factor. **2) The computer you use is hacked (you click on a malicious website or download malware accidentally)** If the computer you use is hacked and you use a cloud based software password manager like LastPass, Dashlane, or even a local password manager like KeePass then the attacker may be able to extract your passwords. As the hacker has access to your computer they essentially have access to everything you have access to on that computer. If the computer you use is compromised the attacker may be able to get your passwords in a couple of ways. a) They log all of your keyboard input (Keylogger) or clipboard if using a software password manager. b) They wait until you unlock your software password manager like LastPass and download the entire database of passwords or access them one-by-one. OnlyKey addresses b) by storing everything offline (cold storage). Essentially OnlyKey is secure by design so that you can only ever write or wipe passwords stored on the OnlyKey. If an attacker gains access to your computer there are no passwords stored there to steal. Even if your OnlyKey is plugged in and unlocked there is no way to download or copy information from the OnlyKey. OnlyKey addresses a) by making MFA usable for users and compatible with the largest number of sites. If a MFA method such as TOTP is used then even if an attacker captures your password they still can't access your account without obtaining your one-time password. One time passwords used by Yubikey OTP are only valid once and Google Authenticator TOTPs are only valid once and for a short period of time, usually 30 seconds. **3) Your cloud based password manager was compromised.** In this scenario you have chosen the convenience of having passwords accessible anywhere you go with the security trade off being that they are being stored online in the cloud. The provider assures you that the accounts will never be hacked but they missed something and now an attacker has access to every account you own. With OnlyKey you can store your most important accounts offline so that they are never susceptible to this type of attack. ## What if I lose my OnlyKey? The data stored on OnlyKey is encrypted with military grade encryption (AES-256-GCM) and cannot be extracted from device. Additionally, with a PIN set on OnlyKey that PIN must be known to use the device. If an attacker tries to guess the PIN it will wipe all data after 10 failed attempts. What about getting my accounts back? This is where the secure encrypted backup anywhere feature comes in. You can create encrypted backups anywhere by just holding the #1 button down on the OnlyKey. This means that only a physical person can initiate a backup (not malware) and it types out the encrypted file so you can save it anywhere in a local text file, email, etc. To restore your data if you lose your OnlyKey you can restore this backup to a new OnlyKey or if you like to plan ahead then get a secondary OnlyKey and restore your backup so it is ready in case your primary is lost. Read more about the technical physical hardware security and encrypted backup feature [here](/security#hardware-security). ## How is OnlyKey Better Than a Smart Card? Smart Cards are commonly used to provide two-factor authentication and decryption/signing for things like email. Unfortunately, if the computer that a smart card is plugged into is compromised by an attacker then the security of the smart card is compromised. All the attacker has to do is capture the keyboard output (keylogging) and they can capture the users smart card PIN. With this PIN they can then authenticate to anything that the user has access to and also decrypt/sign emails as if the user had done so. With OnlyKey your PIN is entered on the 6 digit keypad located on the device itself that does not in any way send this PIN to the connected computer. In this way the PIN entry is offline and inaccessible to an attacker who has compromised the connected computer. In addition to on-device PIN security OnlyKey has functionality that smart cards do not like password management, SSH login, GPG agent and is universally supported without the need for drivers to be installed. The OnlyKey is detected by the computer as a keyboard and no middleware or special drivers are required. OnlyKey can be plugged in and used on a computer that you have never used before and it works without installing anything. The OnlyKey app is required to make changes on your OnlyKey and that is available on Windows, Mac OS, and Linux. ## How is OnlyKey Better Than Other Tokens? There are a variety of hardware and software tokens out there. Some support FIDO U2F and others support Yubikey OTP and yet others support Google Authenticator (TOTP). Unfortunately for users not all websites support all of these. There is no standardization of two-factor support among websites so in order to log in using a token you often need multiple tokens and apps. OnlyKey set out to address this issue and make two-factor authentication usable by supporting the methods most commonly used by websites. Additionally, by combining this with password management we can provide users with a secure login with the touch of a button. ## What specifically are the differences between the Standard Edition firmware and the International Travel Edition firmware? The International Travel Edition firmware is essentially a feature limited version of the OnlyKey. It is a fully functional password manager but does not utilize encryption and may be usable in countries where encryption is banned/restricted. More information [here](/ite). ## What does entering the self destruct PIN do? Depending on what your wipe mode is set to it either wipes all sensitive data (erases your usernames, passwords, keys etc.) or if you are using full wipe mode it does a complete erase of the OnlyKey including sensitive data and all firmware (this requires reloading firmware). Use this PIN when you wish to wipe all sensitive data from the OnlyKey and restore it to a factory default state. ## What apps and services are compatible with OnlyKey? Our team has created several desktop applications for OnlyKey, see details [here](/#apps). OnlyKey can be used with any application that supports passwords entered via a keyboard which means most applications are supported. Additionally, OnlyKey can be used as a security key for any website or app that supports modern two-factor authentication methods like OATH-TOTP (Google Authenticator), FIDO2 (Security Key), and Yubikey OTP. Finally, you can use OnlyKey for developer tools that are compatible with GPG such as GIT and remote access with SSH. Check out the knowledge base for other use cases [here](/#knowledge-base). ## How is the OnlyKey firmware signed and verified? The firmware is signed and only signed firmware can be loaded onto device. Additionally, firmware integrity is verified every time the device boots. In the event firmware verification fails the device is wiped and signed firmware must be reloaded. More information available [here](/security#security-features-overview). ## How can I be sure my OnlyKey does not have a backdoor or was not tampered with? We have designed OnlyKey to be as transparent as possible. The firmware and applications are open source and can be reviewed [here](https://github.com/trustcrypto). Here are some of the features that allow you to validate that there is no backdoor or tampering has occurred. 1. **Hardware** - By having a clear coat on the electronics you can actually see the hardware and would be able to see a hardware type of backdoor. 2. **Open Source** - OnlyKey firmware and apps are published on GitHub and are open to review by the security community. 3. **Decentralized** - Secret keys are generated by you and accessible only to you. Unlike our competitors, we believe in a decentralized model where you have the freedom to control and verify everything on the OnlyKey. ## Is OnlyKey Supported on iPhone, Android, and other mobile devices? Yes, OnlyKey is supported by any device that would support a USB keyboard. A guide to using OnlyKey with mobile devices is available [here](/mobile). --- ## [OnlyKey Features](https://docs.onlykey.io/features/) --- title: OnlyKey Features description: Detailed information on OnlyKey Features slug: features last_updated: Dec, 28 2022 keywords: OnlyKey, Features --- ## OnlyKey Product Details OnlyKey comes in two models: OnlyKey - Features 6 physical buttons, USB-A interface, and multiple color cases ![](/assets/Infographic.png) OnlyKey DUO - Features 3 physical buttons, both USB-C & USB-A interface, and small form factor ![](/assets/infographic-duo.jpg) ### UNIVERSAL SUPPORT Supports Windows, Mac OS, Android, Linux, and Chrome OS. Driverless operation โ€“ Recognized by computer as a regular keyboard. ### PORTABLE. DURABLE. WATERPROOF On-the-go โ€“ Easily attach and detach the OnlyKey to your keychain and bring it everywhere you go. ![](/assets/package.jpg) ### PIN PROTECTED For OnlyKey your PIN code must be typed onto the 6 button keypad of the OnlyKey in order to unlock. For OnlyKey DUO you can use the OnlyKey App to unlock. If you lose OnlyKey no problem, it is PIN protected and canโ€™t be used without the PIN, enter the wrong PIN too many times the data will self destruct. ### WHERE CONVENIENCE AND SECURITY MEET OnlyKey is dual use. It functions as a password manager and a two-factor token. You can plug OnlyKey into any computer, press a button, and it types out a username and password the same as if you typed it yourself; but with one big difference, you donโ€™t have to remember passwords! OnlyKey does that for you. This allows using very complex and secure passwords that cannot be cracked by any available methods. ### SECURE BY DESIGN Information can only be written to the OnlyKey or wiped. This protects your data even if the connected computer has been compromised. Unlike smartcards that are vulnerable to keylogger attacks, the PIN used to unlock OnlyKey is entered on the OnlyKey itself. ## Key Features ### HARDWARE PASSWORD MANAGER Instead of having to remember all of your passwords you can just remember one 7 - 10 digit PIN. OnlyKey stores up to 24 unique accounts in offline storage and can be used to secure an unlimited number of accounts if used in conjunction with a software password manager. You can set up each of the 24 accounts using strong and random (up to 56 character) passwords along with the login page URLs, usernames, and/or two-factor authentication. This way whenever you need to log in you just detach the OnlyKey from your keyring and enter your PIN to unlock your passwords. The Onlykey automatically types them into the login fields for you with the press of a button. ![](/assets/mobile.gif) ### UNIVERSAL 2-FACTOR TOKEN Supports FIDO2 and FIDO Universal 2nd Factor Authentication (U2F), OATH TOTP, and Yubikeyยฎ compatible OTP. Chances are that if the website supports two-factor authentication, OnlyKey is compatible. ![](/assets/fido2.gif) * [FIDO2 and FIDO Universal 2nd Factor Authentication (U2F)](/usersguide#universal-2nd-factor-u2f) * [OATH TOTP](/usersguide#google-authenticator-totp) * [Yubicoยฎ One-Time Password](/usersguide#Yubico-one-time-password) * [Challenge-Response](/usersguide#challenge-response) ### SSH AUTHENTICATION SSH authentication is easy with passwordless login. Your SSH key remains securely stored in hardware and not available to attackers. * [OpenSSH Support](/openssh) * [OnlyKey Agent SSH](/onlykey-agent) ### OPENPGP SUPPORT Using OnlyKey makes OpenPGP easier than ever. ![](/assets/agent.gif) * [OnlyKey WebCrypt](/webcrypt) * [OnlyKey Agent GPG](/onlykey-agent) Keys are loaded using the OnlyKey App. Step by step directions for generating and loading keys are provided in the User's Guide here: * [Generate keys](/importpgp#generating-keys) using Keybase * [Load keys](/importpgp#loading-keys) onto OnlyKey ### SELF-DESTRUCT FEATURE {#self-destruct-feature} In a pinch and want to wipe your OnlyKey? Enter your self-destruct PIN to wipe EVERYTHING! Plus you can always restore from backup easily. * [What does entering the self destruct PIN do?](/faq#what-does-entering-the-self-destruct-pin-do) ### PLAUSIBLE DENIABILITY FEATURE The first and only hardware solution where only you hold the keys + no proof there even are keys! Travel abroad without having to give up your encryption keys/passwords. * [International Travel Edition Guide](/ite) ### ENCRYPTED BACKUP ANYWHERE OnlyKey types out the encrypted backup so it works anywhere independent of apps. Save the encrypted backup to a file or email it to yourself. * For information on setting up and using secure encrypted backup see the user's guide [here](/usersguide#secure-encrypted-backup-anywhere) * For security information on secure encrypted backup see the security page [here](/security#how-backup) ## Other Features ### AUTOMATIC LOCK FEATURE Want your OnlyKey to automatically lock itself after being inactive for 30 minutes? No problem, this is customizable in [OnlyKey preferences](/usersguide#configurable-inactivity-lockout-period). ### USER SELECTABLE TYPE SPEED FEATURE Want your OnlyKey to type out information faster or slower? No problem, this is customizable in [OnlyKey preferences](/usersguide#configurable-keyboard-type-speed). ### SYSADMIN MODE Want your OnlyKey to fill any login form or even automate system administration commands? No problem, enable [Sysadmin Mode](/usersguide#sysadmin-mode). ### ADVANCED HARDWARE SECURITY Once a PIN has been set on your OnlyKey it locks down the hardware so that even if an attacker gains physical access to your OnlyKey, without the correct PIN it will be useless. Read more about [security architecture of OnlyKey](/security). ### INTERNATIONAL KEYBOARD LAYOUTS OnlyKey is the world's first device to allow changing your keyboard layout on the fly. Supports multiple international keyboard layouts: - US_ENGLISH (default) - CANADIAN_FRENCH - CANADIAN_MULTILINGUAL - DANISH - DANISH_MAC - FINNISH - FRENCH - FRENCH_BELGIAN - FRENCH_SWISS - GERMAN - GERMAN_MAC - GERMAN_SWISS - ICELANDIC - IRISH - ITALIAN - NORWEGIAN - PORTUGUESE - PORTUGUESE_BRAZILIAN - SPANISH - SPANISH_LATIN_AMERICA - SWEDISH - TURKISH - UNITED_KINGDOM - US_INTERNATIONAL - CZECH - SERBIAN_LATIN_ONLY - HUNGARIAN - DVORAK ### LED DEFINITIONS {#led-definitions-onlykey-color} * Steady green light = Unlocked first profile * Steady blue light = Unlocked second profile * No light = Locked * Single yellow flash = Button pressed for PIN entry * 3 red flashes = Wrong PIN * Continuous red flashes = Exceeded PIN tries * Continuous green flashes = Backup and restore is complete. * Blue blink then green blink = FIDO U2F request * Blue blink on/off = FIDO2 request * Purple fade in and fade out - Private key signing request (SSH or PGP) * Turquoise fade in and fade out - Private key decryption request * Yellow fade in and fade out - HMAC challenge request * Red fade in and fade out - Device is in [config mode](/security#config-mode) * Steady white light - Device is in bootloader mode, use the OnlyKey app to [load firmware](/usersguide#loading-onlykey-firmware). **ONLYKEY DUO ONLY** * Steady green light = Unlocked first profile * Steady blue light = Unlocked second profile * Steady yellow light = Unlocked third profile * Steady purple light = Unlocked fourth profile ### Button Definitions {#button-definitions} #### Unconfigured OnlyKey {#uninitialized-onlykey} * Hold button #3 down for 5+ seconds to start quick setup - See [OnlyKey Quick Setup](/usersguide#quick-setup) for more information. * Hold button #1 down for 5+ seconds to start quick setup in manual mode. * Hold button #2 down for 5+ seconds to start quick setup in auto mode. #### Locked OnlyKey {#locked-onlykey} * While locked buttons only function to enter PIN code to unlock OnlyKey, 7-10 digits. **ONLYKEY DUO ONLY** * PIN may be entered via OnlyKey App or by physical touch. Touch buttons 1, 2, 3 to enter 1, 2, 3 and hold (for 1 second) buttons 1, 2, 3 to enter 4, 5, 6. #### Unlocked OnlyKey {#unlocked-onlykey} * Tap a button for slot